Cutting tile with a circular saw is a smart alternative to renting or buying a wet saw, especially for large-format tiles or quick DIY jobs. With the right diamond blade, a rigid guide, and proper dust control, you can achieve clean, straight cuts on ceramic, porcelain, and stone without water slurry or expensive equipment.
This guide walks you through blade selection, guide setup, marking techniques, cutting motion, dust safety, and troubleshooting. You’ll learn how to cut tile with a circular saw like a pro, avoid common chipping mistakes, and know when to switch to a different tool entirely.
Choose the Right Diamond Blade for Tile
Pick a Tile-Specific Diamond Blade
Standard wood blades shatter on contact with tile. You need a diamond-tipped blade rated for masonry, porcelain, or stone. These blades use industrial diamond grit bonded to the edge to grind through hard materials without chipping.
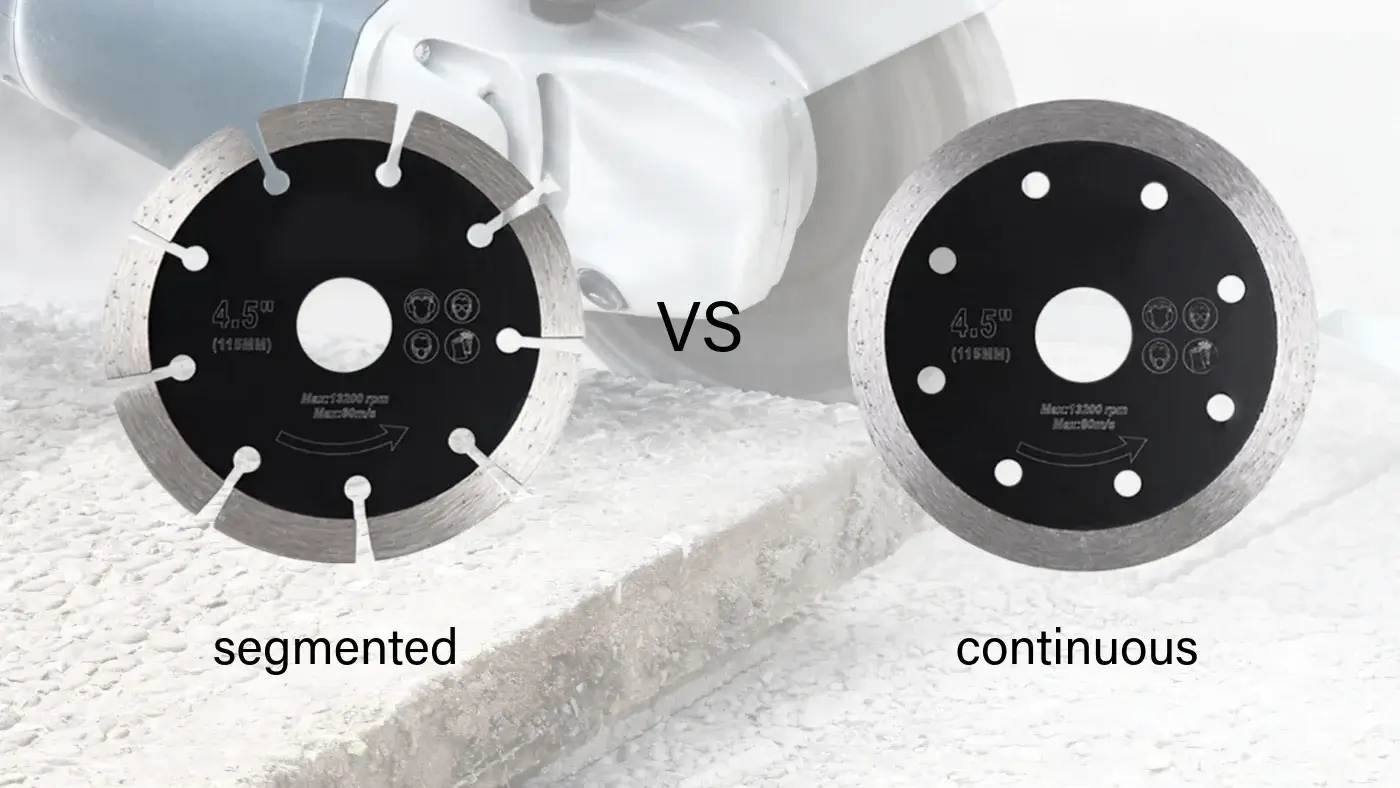
For glossy porcelain, choose a continuous rim blade for smoother, quieter cuts. Segmented rims cut faster but work better on stone or concrete where finish quality matters less.
Wet vs. Dry Diamond Blades
Most circular saws operate dry, so a dry-rated diamond blade is standard. You can also use a wet-rated blade on a dry saw. It won’t damage the blade and often lasts longer due to better heat resistance. Never pour water during cutting unless your saw is designed for it. Mixing water and electricity is dangerous.
If dust is a major issue, pair your setup with a HEPA vacuum to mimic the cleanliness of wet cutting without the mess.
Match Blade Size and Saw Compatibility
Use a 5.5-inch or larger circular saw to ensure enough depth for full-thickness cuts. Most 7¼-inch saws slice through standard ½-inch porcelain easily. Confirm the arbor size matches your blade (usually ⅝ inch). Install the blade with the rotation arrow aligned. Reversing it causes poor cuts and serious safety risks.
Build a Straight-Edge Guide System

Use a Track Rail for Laser-Straight Cuts
Freehand cutting tile produces wavy, inaccurate lines. A track rail system like the Makita Track Saw rail locks the saw base in place and eliminates user error. Clamp one end securely and weight the other to prevent shifting. Align the rail directly over your marked cut line so the blade path matches perfectly.
This setup is critical for large-format tiles where even slight deviations show up after installation.
DIY Guide with a Clamped Straight Board
No track rail? Use a straight scrap board with a factory edge (MDF or melamine works well). Position it parallel to the cut line so the saw’s base rides flush against it and the blade lands exactly on your mark. Measure from the blade to the edge of the shoe to account for offset.
Secure both ends with C-clamps and test the alignment on scrap tile before cutting your final piece.
Mark Tile Accurately with a Template
Use an Existing Tile as a Physical Template
Tiles vary slightly in size from batch to batch. Rather than relying on tape measures alone, use a full uncut tile from your batch as a template. Lay it in position, mark the edge, then transfer the cut line onto the tile with a grease pencil or fine-tip marker.
This method ensures perfect alignment with your layout, especially around outlets, corners, and baseboards.
Map Complex Cuts Like Toilet Flanges
For toilet flanges, place the tile over the rough-in pipe and use an extender ring to trace the flange’s outer edge. Mark the inner diameter for cutting. Leave a ½-inch gap initially, then dry-fit the tile to confirm spacing before extending the final cut line.
This prevents undersizing and ensures a snug, groutable fit without gaps around the flange.
Cut Tile with Controlled, Steady Motion
Start the Saw Before Contact
Always let the blade reach full speed before touching the tile. Starting under load causes binding, chipping, or kickback. Position the saw at the edge with the blade spinning freely, then gently push forward along the guide.
Let the diamond grit do the work. Apply light, consistent pressure and maintain a steady feed rate.
Pull the Saw Toward the Inside Edge
When cutting near edges or making shallow passes, pull the saw toward the inside of the cut line. This keeps downward pressure off the fragile outer edge and reduces chipping or flaking on the visible face.
Think of it like scoring glass. Control where the break happens by managing stress points.
Support Narrow Cuts with a Backer Tile
Cutting thin strips (less than 2 inches) risks vibration and breakage. Place a full spare tile flush against the cut line on the waste side. This gives the blade a solid exit point, stabilizes the narrow piece, and prevents edge chipping.
Remove the support tile after cutting. Don’t cut through both pieces.
Manage Dust and Silica Hazards
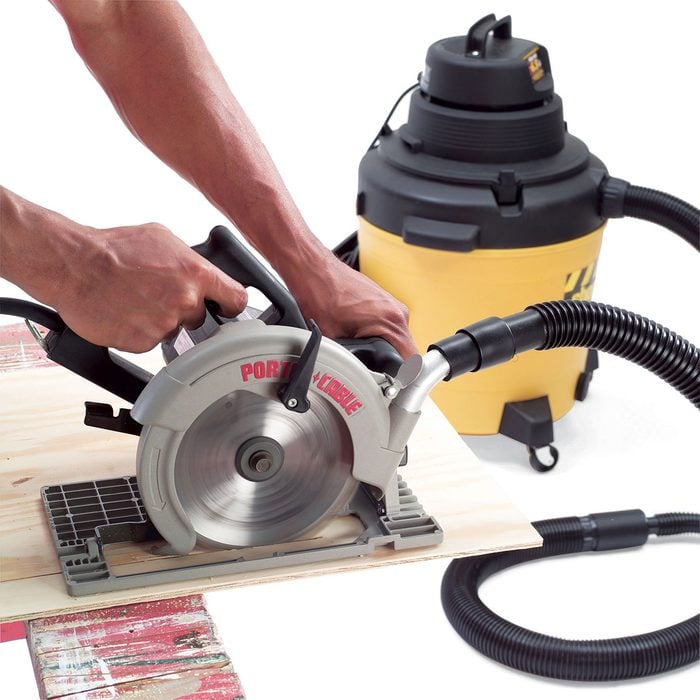
Use a HEPA Vacuum at the Source
Dry cutting generates crystalline silica dust, a known carcinogen. OSHA and NIOSH classify it as a serious respiratory hazard. Connect a wet/dry vac with a HEPA filter directly to the saw’s dust port or hold it close to the cut zone.
Capture dust at the source before it becomes airborne. A high-suction shop vac like the Makita Wet Drive Vac works best.
Wear Full Personal Protective Equipment
Never cut tile without proper PPE:
- N95 respirator or better (P100 recommended)
- Safety goggles sealed against dust
- Hearing protection (circular saws exceed 90 dB)
- Cut-resistant gloves for sharp tile edges
Work in a well-ventilated area and seal off adjacent rooms if cutting indoors.
Never Use a Leaf Blower for Cleanup
Blowing dust with a leaf blower or compressed air spreads silica into the air and forces it into your lungs or the saw motor. Clean only with a HEPA vacuum. Store your tile saw separately to avoid cross-contamination with fine woodworking tools.
Prevent Chipping and Cracking
Support the Entire Tile During Cutting
Porcelain tiles are dense but brittle. Unsupported sections can snap under their own weight or cutting pressure. Place the tile on a stable, flat surface with insulation foam or scrap wood underneath. This cushions the tile and protects your workbench.
For large tiles, have a helper support the far end to prevent sagging.
Cut on the Front Side for Best Finish
Modern diamond blades cut cleanly on both sides. To minimize visible chipping, cut with the finished side facing up. Any minor micro-chipping happens on the back and won’t show after installation.
If chipping persists, slow your feed rate or switch to a continuous-rim blade.
Let the Blade Cool Between Cuts
Continuous cutting generates heat that dulls the blade and risks thermal shock to the tile. After 3–4 long cuts, pause for 30 seconds to let the blade air-cool. Avoid touching the blade or tile immediately. They stay hot.
For extended jobs, make progressive shallow passes instead of one deep cut to dissipate heat gradually.
Handle Material-Specific Challenges
Cut Porcelain Tile with Patience
Porcelain is harder and more abrasive than ceramic. Use a high-quality porcelain-rated diamond blade and cut slowly. Italian porcelain, known for its density, cuts cleanly with steady, controlled motion. Don’t rush.
Support the full tile and use a track rail to prevent deflection.
Adapt for Ceramic and Stone
Ceramic tile is softer and easier to cut. Standard diamond blades work well, but watch for chipping on glazed surfaces. Cutting slowly and supporting the edge helps.
For stone or thick masonry, ensure your saw has at least 1½ inches of depth of cut. Use a segmented diamond blade designed for stone to handle abrasiveness and heat.
Fix Common Cutting Problems
Why Tile Chips During Cutting
Chipping usually comes from poor support, excessive speed, or a dull blade. Fix it by:
- Using a backer tile for narrow cuts
- Slowing your feed rate
- Replacing the blade if it’s glazed or worn
Cutting too fast causes the blade to grab and tear the material.
Uneven or Wavy Cuts? Check the Guide
If your cuts aren’t straight, you likely freehanded the cut or had a loose guide. Never rely on eye-hand coordination for tile. Use a clamped track rail or straight board. Check that clamps are tight and the guide doesn’t shift during the pass.
Test alignment on scrap tile first.
Overheating Blade? Reduce Feed Pressure
A hot blade signals excessive friction. Causes include pushing too hard, cutting too fast, or long continuous cuts without breaks. Ease up on pressure and let the blade grind at its own pace. Make shallow passes if needed and allow cooling time between cuts.
Know When Not to Use a Circular Saw

Avoid for Intricate or Curved Cuts
A circular saw is built for straight lines only. For L-cuts, notches, or curves, use an angle grinder with a diamond wheel or tile nippers. These tools offer the maneuverability needed for complex shapes.
Attempting curves with a circular saw is dangerous and yields poor results.
Skip for High-Volume Jobs
If you’re cutting dozens of tiles daily, a wet saw or bridge saw is faster and safer. The circular saw method is ideal for 1–10 cuts per project, especially with large or thick tiles.
For repetitive cuts, a wet saw’s water cooling and built-in fence save time and reduce dust.
Use the False Grout Joint Trick
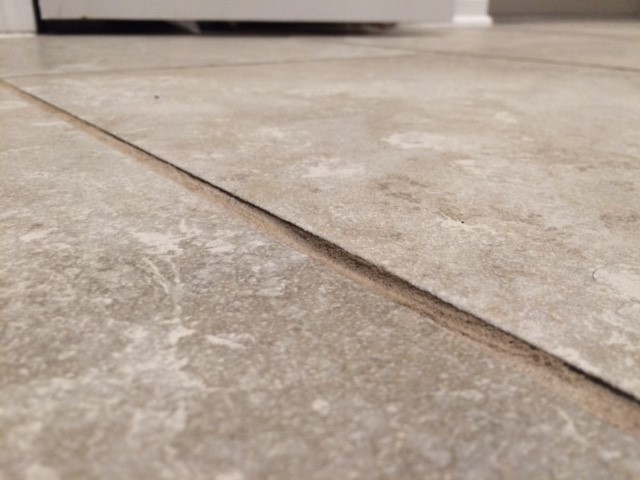
Replace Tiny Slivers with Grout
When your layout ends with a sliver less than 2 inches wide, don’t cut and install it. Thin pieces are fragile, hard to set, and prone to cracking.
Instead, cut a clean line at the end of the full tile and fill the gap with grout to create a false grout joint. This looks intentional, adds durability, and eliminates weak edges.
How to Execute the False Joint
- Dry-fit tiles to confirm the sliver size
- If under 2 inches, plan to stop at the previous full tile
- Cut a straight edge where the sliver would start
- Grout the gap using matching sanded grout
- Tool the joint smooth for a seamless finish
This produces a strong, clean edge that won’t crack or shift.
Maintain Your Tools After Use
Clean Saw and Blade with Vacuum Only
After cutting, never use compressed air. Wipe the saw body with a damp cloth and vacuum all dust from vents, blade guard, and base plate. Silica dust is corrosive and damages motor windings over time.
Remove the blade and inspect for glazing or missing segments.
Store Blade and Saw Separately
Designate a sacrificial saw for tile, masonry, and concrete work. Never use your fine woodworking saw for tile. Dust infiltration ruins bearings and motors.
Store the tile saw in a sealed bin labeled “Masonry Use Only.”
Frequently Asked Questions About Cutting Tile with a Circular Saw
Can a regular circular saw cut tile?
Yes, but only with a diamond-tipped blade rated for tile, porcelain, or stone. Standard wood or metal blades will shatter on contact. The setup also requires a rigid guide and proper dust control for safe, clean results.
What blade do I need to cut tile with a circular saw?
You need a dry-cut diamond blade specifically rated for ceramic, porcelain, or stone. Continuous-rim blades produce smoother cuts on glossy porcelain, while segmented rims work faster on stone or concrete. A quality blade costs around $35 and lasts through multiple projects.
Is it safe to cut tile dry with a circular saw?
Dry cutting is safe only with proper dust control. Silica dust is a known carcinogen, so you must use a HEPA-filtered vacuum at the source and wear an N95 respirator or better. Without these precautions, dry cutting poses serious respiratory risks.
How do I prevent chipping when cutting porcelain tile?
Support the entire tile on a flat surface with foam or scrap wood underneath. Use a continuous-rim diamond blade, cut slowly, and let the blade do the work. For narrow strips, place a backer tile alongside the cut to stabilize the piece and prevent vibration chipping.
Can I cut large-format tiles with a circular saw?
Yes. A circular saw with a track rail is often better than a wet saw for large-format porcelain because the tiles exceed standard wet saw table sizes. Ensure your saw has at least 5.5-inch blade capacity and use a guide rail for straight, accurate cuts.
When should I use an angle grinder instead of a circular saw?
Use an angle grinder for L-cuts, notches, curves, or small intricate shapes. Circular saws are designed for straight lines only and become dangerous when forced into curved cuts. Tile nippers also work for tiny detail work around outlets or fixtures.
Key Takeaways for Cutting Tile with a Circular Saw
Cutting tile with a circular saw is a powerful, cost-effective technique when done right. With a $35 diamond blade, a clamped guide rail, and strict dust control, you can achieve cuts that rival a wet saw, especially on large or thick tiles. The method saves money, avoids water mess, and leverages tools you may already own.
Precision comes from the guide, not the saw. Safety depends on HEPA vacuum use and N95 protection. Quality results demand slow, steady cutting with full support.
For straight cuts in ceramic, porcelain, or stone, the circular saw isn’t just a backup. It’s a smart, professional-grade solution. Start by practicing on scrap tile, set up your guide system, and always prioritize dust control before making your first cut.