Cutting retaining wall blocks without a saw is a practical skill every DIY landscaper should master. Whether you need to trim landscape blocks for a tight fit, split cinder blocks for a garden wall, or create natural-looking edges, a masonry chisel and sledgehammer can deliver clean, professional results. This method costs under $30 in tools, requires no electricity, and produces cuts in about 2.5 to 3 minutes per block when done correctly.
Below, you’ll learn the exact hand-tool technique used by experienced masons, including how to mark precisely, score effectively, and control the break for straight cuts, angled edges, and rustic split-face finishes. You’ll also discover why manual cutting often beats power saws for small projects and how to avoid common mistakes that ruin blocks.
Essential Tools for Manual Cutting
Use the Right Chisel
A dedicated masonry chisel (also called a cold chisel) is the foundation of this method. Unlike wood chisels with shock-absorbing handles, masonry chisels transfer full impact energy into the concrete. A $10 masonry chisel cuts cleanly and efficiently, while a wood chisel can take over 10 minutes per block and causes jagged breaks. Always choose a steel-handled masonry chisel designed for concrete work.
Choose the Correct Hammer
A 4-pound sledgehammer delivers optimal force with control. Lighter hammers (2 to 3 pounds) require faster, harder swings and increase physical strain. For scoring softer cinder blocks, a standard hammer works fine, but a 3 to 5 pound sledge is best for dense landscaping blocks. Avoid claw hammers, as they lack the mass needed to drive the chisel deep enough.
Marking and Measuring Supplies
Precision starts with accurate marking. You’ll need a tape measure for calculating center points, a pencil or marker for visible lines, a straight edge or speed square to connect marks across faces, and an optional level for alignment checks.
Safety Gear You Must Wear
Cutting concrete by hand produces flying debris, loud noise, and hazardous dust. Protect yourself with safety glasses to prevent eye injury, work gloves to shield hands from sharp edges, hearing protection for repeated strikes, and a dust mask to avoid inhaling silica dust. Always work in a well-ventilated area.
Stable Work Surface Setup
Never hold the block in your hand while striking. Use two sawhorses, bricks, or cinder blocks to support both ends, suspending the cut line in the air. This setup allows the block to flex and break cleanly. For ground-level work, place a small scrap wood block under the score line to guide the fracture.
Step-by-Step Cutting Process

Mark the Cut Line Accurately
Your cut quality depends entirely on your marking accuracy. For a straight cut on an 11-inch block, measure and mark the cut point (5.5 inches for center). Mark both front and back edges on the top face, then use a straight edge to draw a line connecting the marks across the top. Transfer this line around all four sides using a speed square, covering the top, front, back, and bottom.
Pro Tip: To guide the fracture, mark a point 8 inches from one edge on the opposite face, then 4 inches from the same edge. Connect these points to create a directional stress path that encourages a clean break.
Score Around the Entire Perimeter
Scoring creates a weak point for controlled breaking. Place the chisel tip directly on the marked line and tap lightly to seat the chisel. Strike firmly along the top line, going over it twice to deepen the groove. Repeat on the front, back, and bottom edges. Do not skip end scoring, as this ensures the break travels fully across the block.
Visual Cue: You should see a continuous, deep groove (about 1/8 to 1/4 inch) around the entire block before attempting the final break.
Position for a Clean Break
Place the block on two supports so the scored line hangs freely between them. This positioning allows downward flexing when struck, encouraging a clean split. If working on the ground, slide a 2×4 under the score line to lift that section slightly.
Deliver Controlled Impact
Align the chisel with the deepest part of the scored groove. Use a firm, controlled swing with the sledgehammer, striking along the top score line first. Rotate the block to hit the side scores if needed, and let the block break naturally. Excessive force causes jagged edges and wasted material.
Time Estimate: With proper scoring, the block typically splits cleanly in 3 to 5 solid hits.
Finish the Cut Edge
After splitting, inspect for rough nubs or protrusions. Use the chisel and light hammer taps to chip away uneven sections. Smooth the edge slightly for a clean fit, especially if joining blocks. For a natural look, avoid over-smoothing and retain some texture to match the block’s face.
Specialized Cutting Techniques
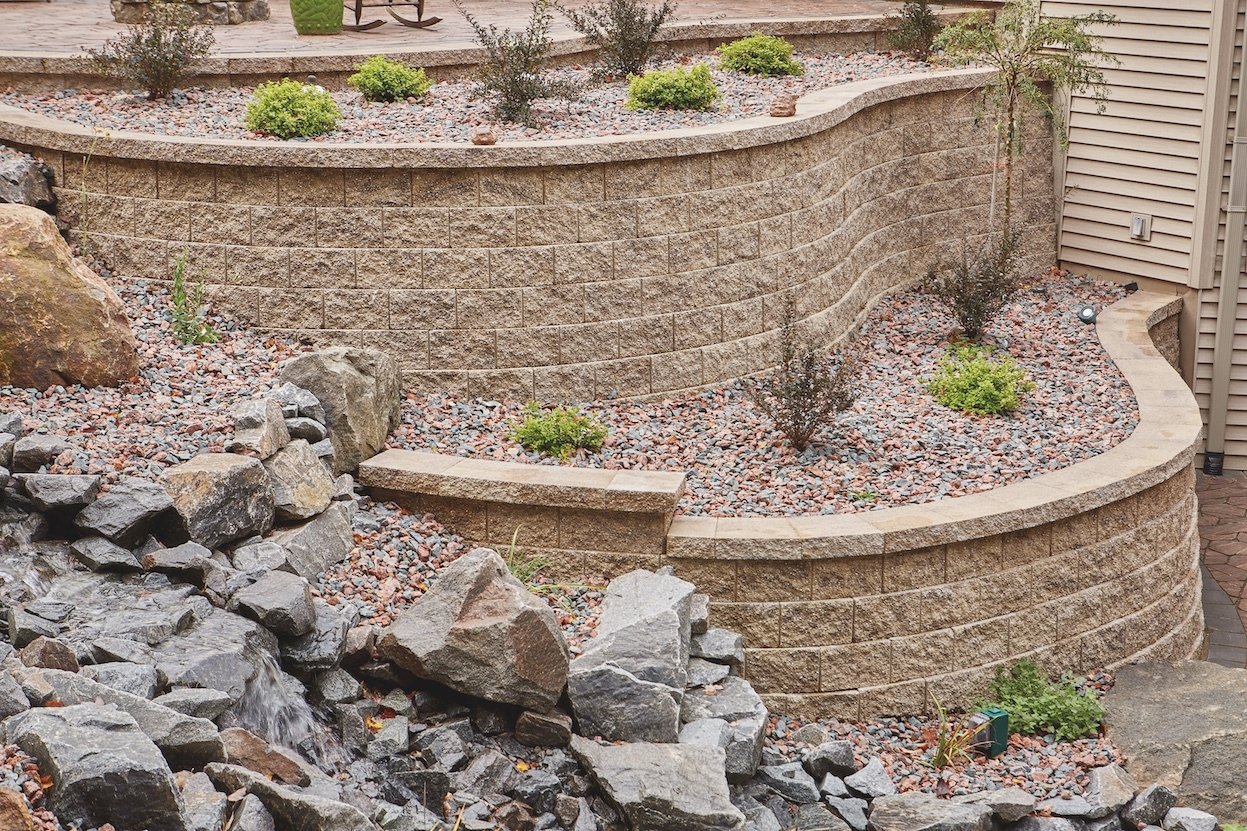
Create a Natural Split-Face Edge
A split-face edge mimics the rugged texture of natural stone and blends perfectly with retaining walls. Mark the center line around all four sides, then score lightly and evenly with a masonry chisel and 3 to 5 pound sledge. Use gentle, repeated taps and allow the block to fracture along its internal aggregate pattern. Let it break naturally with minimal force for a rough, organic edge that looks factory-split.
Build 90-Degree Corners by Hand
To form a corner without specialty blocks, cut two blocks at 45-degree angles. Mark the diagonal line from corner to corner on the top face, score along the diagonal on all four sides, and break carefully with light, controlled strikes. Join the angled edges with concrete adhesive for a strong, seamless corner.
Note: Freehand 45-degree cuts are challenging. For beginners, consider using pre-made corner blocks instead.
Use Pre-Made Corner Blocks as an Alternative
Skip the angled cut entirely by buying pre-split 90-degree corner blocks. These have a finished rustic face on both sides and simply stack and mortar in place. This approach saves time and ensures perfect alignment.
Cost-Saving Tip: For small walls, six pre-made corners often cost less in labor and material waste than attempting difficult manual angle cuts.
Why Hand Tools Beat Power Saws for Small Jobs

Faster Than Setup Time
While a wet saw cuts quickly, setup (water supply, extension cords, safety gear) takes considerable time. For fewer than 20 blocks, the manual method is often faster overall. Each hand-cut block takes 2.5 to 3 minutes with proper tools, compared to 10+ minutes with a wood chisel.
Lower Cost, Higher Value
Total investment runs $25 to $30 for a masonry chisel ($10) and sledgehammer ($15 to $20). These tools last for years and can be reused on future projects. No electricity, blades, or maintenance required.
Better Aesthetic for Rustic Walls
Power saws leave a smooth, artificial edge that stands out on natural-looking retaining walls. The hand-split method creates a textured, split-face finish that matches the rest of the block, giving a seamless, professional appearance.
Cleaner Breaks with Proper Technique
When scored fully around the perimeter, blocks split cleanly along the intended line. The fracture follows the path of least resistance created by the score, resulting in predictable, straight breaks every time.
Safety Protocols to Prevent Injury
Wear Full Protective Gear
Safety glasses prevent concrete chips from causing permanent eye damage. Repeated hammer-on-chisel impacts exceed safe noise levels, so use hearing protection. Heavy-duty gloves reduce blisters and protect from sharp edges. Silica dust is a respiratory hazard, so wear a dust mask and work upwind when possible.
Inspect Tools Before Use
Check the chisel tip for cracks or mushrooming (flared metal). A deformed head can shatter on impact, sending metal fragments flying. Replace damaged chisels immediately to prevent serious injury.
Secure the Work Area
Keep bystanders at least 10 feet away from the cutting zone. Work on stable, level ground and never cut a block while holding it. Always use proper supports like sawhorses or stacked bricks.
Use Proper Striking Technique
Grip the sledgehammer near the head for better control, especially with a 4-pound model. Swing in a controlled arc and avoid overextending or using wild swings that reduce accuracy and increase injury risk.
Troubleshooting Common Problems
Block Won’t Split
The score line is likely too shallow or incomplete. Rescore all four sides, especially the ends, and ensure the groove is at least 1/8 inch deep. Recheck that the block is free to flex on its supports.
Jagged or Uneven Break
Striking too hard before scoring is complete usually causes this issue. Use lighter, more frequent taps during scoring and score the entire perimeter twice before attempting the final break.
Excessive Vibration or Hand Fatigue
Using a wood chisel or light hammer causes this problem. Switch to a masonry chisel and 4-pound sledgehammer, as the correct tools transfer energy efficiently and reduce strain significantly.
Smooth, Artificial-Looking Edge
Over-cutting or forcing a shear break creates this issue. For rustic walls, use the split-face technique: score lightly and let the block break naturally along its internal grain.
Block Shifts During Cutting
Unstable support causes this problem. Use two sawhorses or bricks of equal height and ensure the block doesn’t wobble before striking.
Pro Tips for Best Results
Cut in Batches for Efficiency
Mark all blocks first, then score all blocks completely, and finally break them one by one. This assembly-line method reduces setup time and keeps your rhythm consistent throughout the project.
Match the Wall’s Texture
For a cohesive look, always finish cut edges to resemble the block’s natural face. Avoid sanding or grinding, as hand-chiseling preserves authenticity and blends seamlessly with uncut blocks.
Keep Your Chisel Sharp
A dull chisel requires more force and increases slippage risk. Sharpen the tip occasionally with a bench grinder or file to maintain a clean cutting edge that bites into concrete efficiently.
Work in Daylight or Bright Light
Clear visibility is essential for accurate marking and striking. Shadows can hide score lines and lead to misaligned cuts, so plan your work for optimal lighting conditions.
Store Tools Properly
After use, clean the chisel tip and store tools in a dry place. A rusted or damaged chisel performs poorly and can be dangerous during use.
Frequently Asked Questions About Cutting Retaining Wall Blocks Without a Saw
Can you really cut retaining wall blocks without any power tools?
Yes, absolutely. A masonry chisel and sledgehammer can cut retaining wall blocks cleanly in about 2.5 to 3 minutes per block when proper scoring techniques are used. This method has been used by masons for decades and produces professional results.
What is the best chisel for cutting concrete blocks by hand?
A dedicated masonry chisel (cold chisel) is the best option. These steel-handled tools transfer impact energy directly into the concrete without absorption. Wood chisels should never be used, as they can take over 10 minutes per block and produce jagged, unpredictable breaks.
How deep should the score line be before breaking the block?
The score line should be approximately 1/8 to 1/4 inch deep around the entire perimeter of the block. Going over each line twice with firm, consistent strikes typically achieves this depth. Incomplete scoring is the most common cause of failed breaks.
Is it cheaper to cut blocks by hand or rent a wet saw?
For small to medium projects (under 20 blocks), hand cutting is cheaper because you avoid rental fees, blade costs, and setup time. The total tool investment is only $25 to $30, and these tools last for multiple projects over many years.
How do you cut a 45-degree angle on a retaining wall block?
Mark the diagonal line from corner to corner on the top face, then transfer this line around all four sides using a speed square. Score along the diagonal on all faces and break with light, controlled strikes. This technique requires practice, so consider pre-made corner blocks for beginners.
What safety equipment is required for manual block cutting?
You need safety glasses, work gloves, hearing protection, and a dust mask at minimum. Safety glasses are the most critical item, as concrete shards can cause permanent eye damage. Hearing protection prevents long-term damage from repeated impact noise.
Key Takeaways for Cutting Retaining Wall Blocks Without a Saw
Cutting retaining wall blocks without a saw is a practical, cost-effective skill that delivers professional results for small to medium projects. The method requires just two essential tools: a $10 masonry chisel and a $15 to $20 sledgehammer. With proper technique, you can achieve clean splits in 2.5 to 3 minutes per block, faster than setting up a wet saw for fewer than 20 blocks.
The three critical factors for success are precise marking, full-perimeter scoring, and controlled breaking. Always score all four sides of the block to a depth of at least 1/8 inch before attempting the final break. Use the split-face technique for natural-looking edges and consider pre-made corner blocks for complex angles.
Your next step is to gather your tools, practice on a few scrap blocks, and start your project with confidence. The manual method saves money, eliminates power tool dependency, and produces results that blend naturally with any landscape design.