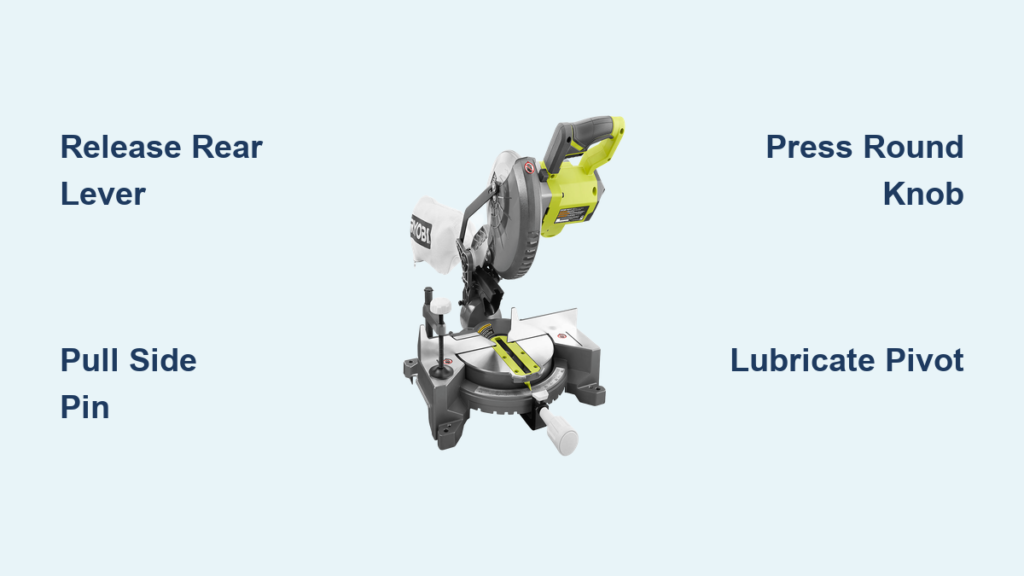
If your Ryobi miter saw won’t budge, don’t panic. The saw isn’t broken. It’s locked. Ryobi builds several safety and transport locks into their miter saws to keep the blade secure during shipping and storage. Learning how to unlock a Ryobi miter saw means identifying which lock is engaged and releasing it correctly. This guide covers every locking mechanism, from the rear arm lever to the side pivot pin, so you can get back to cutting in minutes.
You’ll learn exactly where each lock is located, how to release it without forcing anything, and what to do if a pin is stuck from rust or long-term storage. We also cover setup steps that new owners often mistake for lock issues.
Release the Rear Arm Transport Lock
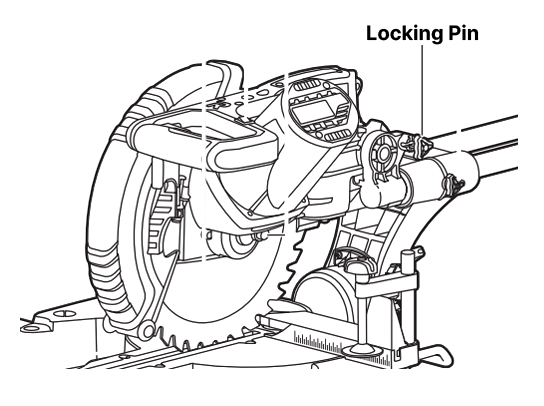
The arm transport lock holds the blade arm down so the saw stays compact during shipping. If your blade won’t lift up or down, this lock is almost certainly still engaged.
Find the Black Release Lever
The release lever sits on the back of the saw, just behind the pivot where the arm meets the base. It’s a small black tab that blends into the metal housing, which makes it easy to miss. Crouch down and look at the saw from behind to spot it clearly.
Pro Tip: Paint the lever with red nail polish or stick a bright label on it. Future you will thank present you.
Pull the Lever to Free the Arm
- Press down on the saw arm with your left hand to relieve tension on the lock.
- Reach behind the saw and pull the black lever outward, away from the housing.
- Slowly release downward pressure while holding the lever out.
- Test the up-and-down motion to confirm the arm moves freely.
Lock It Back Down for Storage
When you’re done cutting and need to move the saw, lower the arm fully. Push the black lever back inward until you hear a click. Release pressure and confirm the arm stays firmly locked in place.
Unlock the Blade Rotation Pivot

If the saw head won’t rotate left or right for angled cuts, the pivot lock is the culprit. Ryobi uses two main designs depending on the model.
Release the Side Pin on Most Models
Many Ryobi miter saws use a small black pin on the right side of the saw head. This pin locks rotation during straight cuts and transport.
Follow These Steps:
- Push the pin down slightly. It only moves a fraction of an inch.
- Pull the pin straight out. Do not twist or yank it sideways.
- The saw head should now rotate freely to your desired angle.
Angle Detents: Look for preset click stops at 0°, 15°, 30°, and 45°. A spring-loaded ball snaps into each detent for accurate cuts.
Release the Round Knob on the TS1346 Model
The Ryobi TS1346 uses a round knob near the handle instead of a pin. The release action feels different but works the same way.
Follow These Steps:
- Press the knob down firmly with steady pressure.
- Pull it straight out. This is a press-and-pull motion, not a screw.
- The blade assembly unlocks and pivots smoothly.
Warning: Never try to unscrew this knob. It has no threads. Forcing it will damage the internal mechanism and create a real problem.
To re-lock, push the knob back in until it seats.
Free a Stuck Release Pin or Knob
Sometimes the pin or knob refuses to move. Dust, rust, or months of sitting in a garage can seize the mechanism. Here’s how to coax it loose without breaking anything.
Loosen a Seized Pin with Vice Grips
- Clamp vice grips or locking pliers onto the exposed end of the pin. Grip gently to avoid crushing it.
- Wiggle the pin back and forth to break corrosion inside the housing.
- Spray WD-40 directly into the pin hole to penetrate the rust.
- Wait 5 to 10 minutes, then work the pin in and out repeatedly.
Success Signal: The pin slides smoothly with light finger pressure and no resistance.
Avoid: Hammers, pry bars, or brute force. These bend internal parts and turn a simple fix into a costly repair.
Lubricate a Stiff Pivot Joint

Even with the pin removed, the saw head might resist turning. A bound pivot joint is the usual cause, and lubrication solves it in most cases.
Work WD-40 into the Pivot
- Spray WD-40 directly into the pivot joint where the head meets the base.
- Rotate the saw head slowly through its full left-to-right range.
- Repeat the motion for 30 seconds to push lubricant deep into the mechanism.
Note: Full disassembly is rarely needed. Most stiffness clears up with lubricant and repeated movement.
Maintenance Tip: Spray a light coat of WD-40 on the pivot every few months. This prevents future binding and keeps the action smooth.
Assemble the Handle on the TS1346
New saw owners sometimes think the saw is locked when the handle simply isn’t installed yet. The TS1346 ships with a separate metal handle that must be attached before use.
Install the Handle in Three Steps
- Insert the metal handle into the slot on the back of the saw.
- Turn the handle clockwise until it feels snug and solid.
- Confirm there’s no wobble or play in the handle.
Why It Matters: A loose handle makes the saw feel unstable and unsafe. It can mimic a “stuck” saw because the control feels off.
Attach the Dust Collection Bag
Missing the dust bag is another setup step that causes confusion. Without it, sawdust flies everywhere and beginners may think something is wrong with the saw.
Snap the Bag onto the Front Post
- Squeeze the flexible ring at the top of the dust bag.
- Slide the ring onto the front post of the saw.
- Release the ring so it snaps into place.
Best Fit: Use the third section of the post, the one farthest from the saw body. This position captures the most sawdust and keeps the bag out of your way.
Install the Front Guard and Adjust the Fence
Two final setup pieces often get overlooked during unboxing. Both are quick to install and essential for safe operation.
Slide On the Front Guard
The front guard is a small plastic piece that protects the blade when the saw is idle. Slide it into the front slot until it fits snugly. No tools required.
Position the Fence for Your Material
The fence holds your workpiece steady during cuts. Loosen the side screw to slide the fence left or right. Position it to support your material, then tighten the screw firmly before cutting.
Safety Steps Before You Start Cutting
Never skip these checks, especially right after unlocking or assembling your saw. A few seconds of precaution prevents serious injury.
Unplug the Saw First
Always disconnect power before installing parts, changing blades, or troubleshooting. The saw should never be plugged in while your hands are near moving components.
Keep Hands Out of the Danger Zone
Never reach near the blade path. Look for a red circle with a hand symbol marking the danger zone. Use the handle to lower the blade every time. Never push the blade down with your hand.
Confirm All Locks Are Secure
Before making any cut, double-check that the pivot knob or pin is fully reinserted for straight cuts. Verify the arm moves freely and the guard retracts properly when you lower the blade.
Prevent Future Locking Problems
A little routine care saves hours of frustration later. These habits keep your Ryobi miter saw working smoothly for years.
Lubricate Every Month
Spray WD-40 on three key areas:
– The pivot joint where the head meets the base
– The release pin hole on the side
– The arm hinge at the rear
Work each part through its full motion after spraying to distribute the oil evenly.
Mark the Rear Release Lever
Use red nail polish or a bright sticker on the rear transport lock lever. It blends into the metal housing, so a visual marker saves time every time you set up the saw.
Save a Local Copy of the Manual
Download the Ryobi miter saw PDF manual from the official website. Save it to your phone or computer. Web links change or disappear over time, but a local file stays accessible forever.
Frequently Asked Questions About Unlocking a Ryobi Miter Saw
Where is the transport lock on a Ryobi miter saw?
The transport lock is a small black lever on the back of the saw, just behind the pivot point where the arm meets the base. Pull it outward while pressing down on the arm to release it.
Why won’t my Ryobi miter saw rotate left or right?
The pivot lock is engaged. Most models use a small black pin on the right side that you push down and pull out. The TS1346 model uses a round knob that presses down and pulls straight out.
Can I unscrew the round knob on my TS1346 miter saw?
No. The round knob on the TS1346 is a press-and-pull mechanism, not a screw. Turning it like a screw will damage the internal components. Press down firmly and pull straight out instead.
What should I do if the release pin is stuck?
Clamp vice grips gently onto the pin and wiggle it back and forth to break corrosion. Spray WD-40 into the pin hole, wait 5 to 10 minutes, then work the pin in and out until it moves freely.
Do I need to oil my Ryobi miter saw regularly?
Yes. Spray WD-40 on the pivot joint, release pin hole, and arm hinge every few months. Work each part through its motion after applying lubricant to keep the saw operating smoothly.
Is the dust bag required for the saw to work?
The dust bag is not required for cutting, but it is highly recommended. It captures sawdust, keeps your workspace cleaner, and improves visibility of your cut line. Attach it to the third section of the front post for the best fit.
Key Takeaways for Unlocking Your Ryobi Miter Saw
Unlocking a Ryobi miter saw comes down to identifying the right lock and releasing it properly. The rear black lever frees the blade arm for vertical movement. The side pin or round knob unlocks rotation for angled cuts. WD-40 fixes most stubborn pins and stiff pivots without disassembly.
Always unplug the saw before any adjustment, keep your hands clear of the blade path, and confirm all locks are secure before cutting. With these steps in mind, you can unlock, set up, and start making accurate cuts on your Ryobi miter saw with confidence.