Gaps at trim corners can ruin an otherwise beautiful room. Whether you’re installing baseboards, crown molding, or cabinet trim, the difference between amateur and professional results comes down to how precisely you cut with your miter saw. Walls are rarely perfectly square, and standard measuring methods often produce joints that don’t close tightly.
This guide teaches you exactly how to cut trim with a miter saw using professional techniques. You’ll learn how to handle inside and outside corners, work around thick baseboards that exceed your saw’s capacity, and use the “Mark and Cut” method for irregular installations. Every step is drawn from proven methods used by finish carpenters.
Essential Tools and Safety Setup for Miter Saw Trim Work
A clean, organized workspace prevents costly mistakes and serious injuries. Before making your first cut, gather everything you need and review the safety rules.
Must-Have Tools and Supplies
• Compound miter saw with adjustable miter and bevel angles
• Measuring tape and pencil for precise layout marks
• Level (optional) to verify plumb on walls
• Clamps and a nail set for securing joints and sinking fasteners
• 18-gauge, 2-inch finish nails ideal for baseboard fastening
• Wood glue, filler, caulk, and sandpaper for joint reinforcement and finishing
Critical Safety Rules to Follow
• Always wear safety glasses to protect against flying wood chips
• Use ear protection during extended cutting sessions
• Keep hands clear of the blade path and hold trim firmly against the fence
• Wait for the blade to stop completely before lifting the saw arm, especially during bevel cuts
• Double-check all angles and measurements before cutting final pieces
Cutting Inside Corners Using the 45-Degree Miter Method
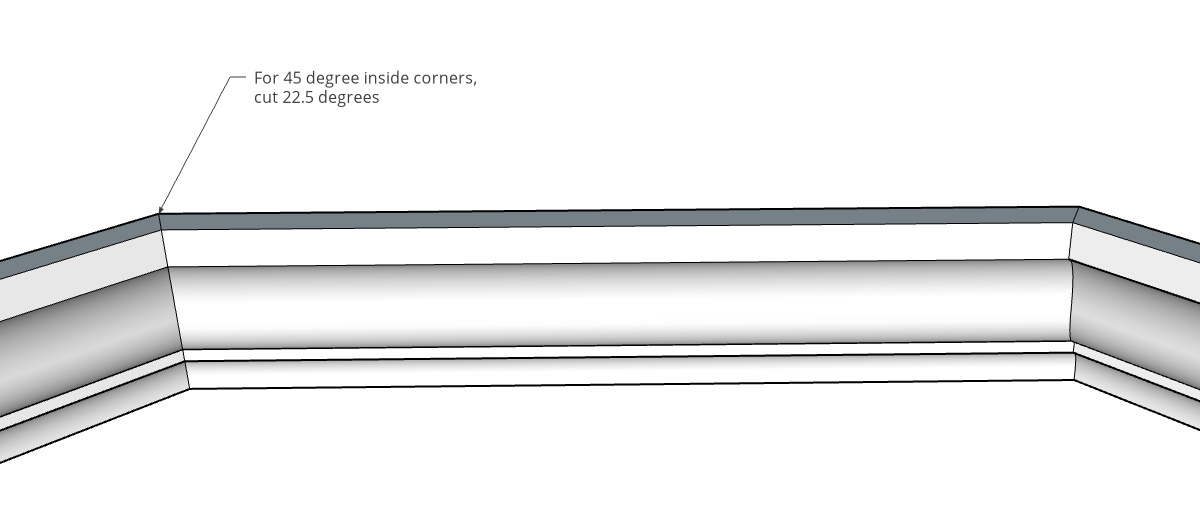
Inside corners require two pieces of trim meeting at a 90-degree angle, each cut at 45 degrees. The challenge is achieving a tight fit when walls aren’t perfectly square.
Standard 45-Degree Cut Setup
- Position the trim with the back face toward you and the bottom edge flush against the saw fence.
- Set the miter angle to 45 degrees left and lock it in place.
- Hold the trim securely and make a clean, full-depth cut.
For the second piece, you can’t simply flip and repeat because the saw’s motor housing blocks the cut. Instead:
• Reset the miter to 0 degrees
• Tilt the blade to a 45-degree bevel down
• Rotate the trim so the top edge faces you and rest it flat on the deck
• Make the cut with the bevel forming the same 45-degree angle
This ensures both pieces form a perfect “in” bevel joint when joined together.
Pro Tip: Assemble Off the Wall First
Never nail baseboards to the wall before joining inside corners. Drywall corners are rarely square, and mud buildup creates uneven surfaces.
• Glue and clamp the joint off the wall first
• Use ¾-inch thick pine for added stability
• Drive temporary nails through the joint to hold it while the glue cures
• Install the full assembly as one unit for a seamless fit
Cutting Thick Baseboards with the Bevel Cut Method
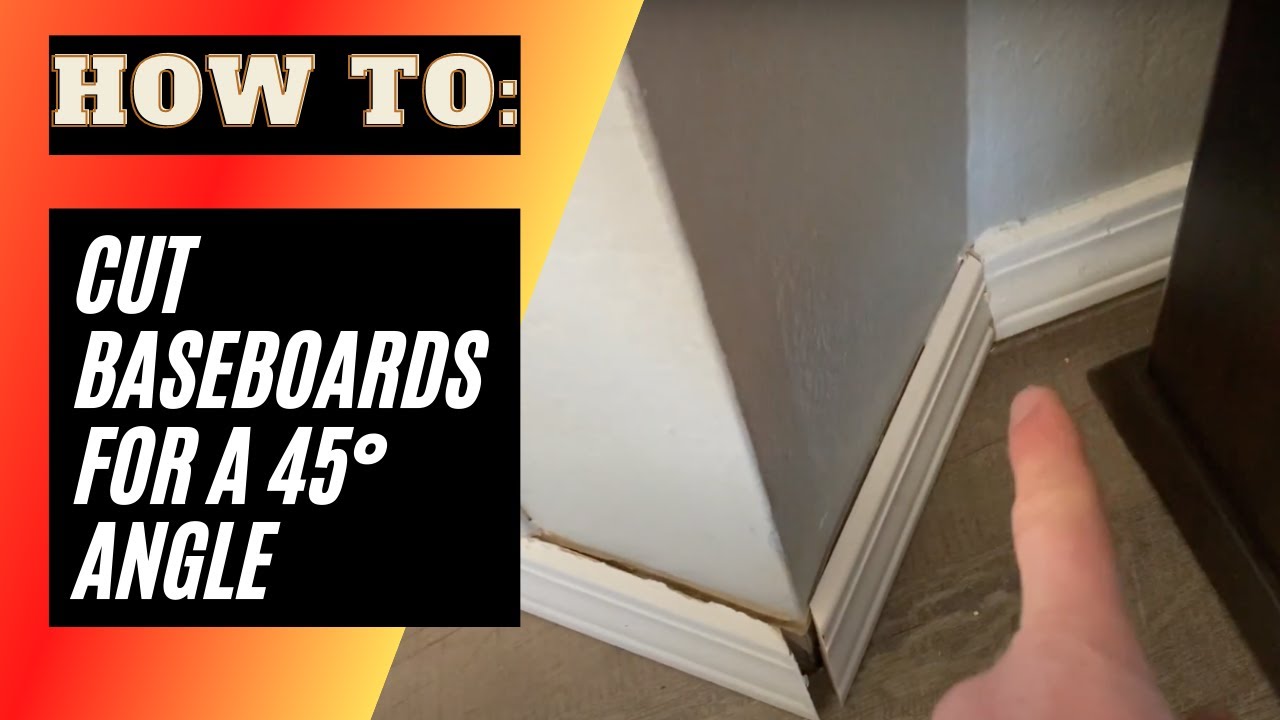
Standard 10-inch miter saws cannot fully cut thick base molding (such as 4.5-inch or wider profiles) at a 45-degree miter angle. The blade hits the base before completing the cut.
Use a 45-Degree Bevel Cut Instead
When miter depth is insufficient, follow these steps:
- Set the miter angle to 0 degrees for a straight cut
- Tilt the blade to 45 degrees in bevel mode
- Place the molding face-up with the cut edge tight against the fence
- Cut the first piece with the bevel slanting outward
- Flip the second piece so the bevel faces the opposite direction
- Join the two pieces to form a clean outside corner with no gaps
This bevel-cut method is essential for wide baseboards and ensures full blade penetration without multiple passes.
How to Cut Outside Corners Perfectly
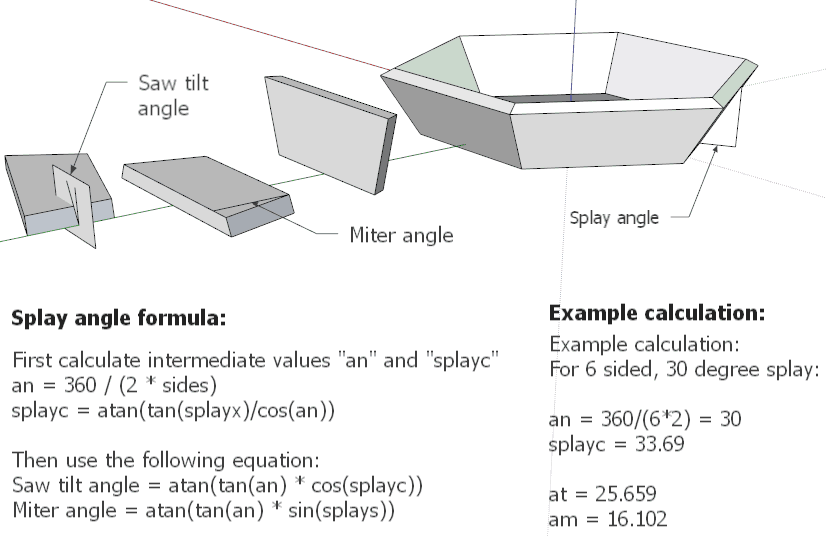
Outside corners wrap around protruding walls or cabinets. The bevels face outward, and precision is critical for tight joints.
Standard Outside Corner Technique
- Set the miter saw to 45 degrees left
- Orient the trim with the outer edge facing you
- Use a 45-degree bevel cut if needed for clearance
- Cut both pieces with the same angle, ensuring bevels face away from the wall
- Test-fit before nailing and adjust if gaps appear
Add 1/16 Inch for a Snug Fit
Measure the trim length and add 1/16 inch to the mark. This slight overage compensates for wall imperfections and ensures the joint closes tightly without forcing it.
• Mark the outside edge of the corner
• Add the 1/16-inch buffer
• Cut and test-fit the piece
If the joint binds, sand or file the edge slightly. Never force it, as this can crack the wood or misalign the trim.
No-Measure Method: Mark and Cut for Irregular Shapes
When walls are out of square or you’re wrapping around cabinets, measuring and calculating angles leads to errors. The “Mark and Cut” method eliminates math and guarantees perfect fits.
Step-by-Step Mark and Cut Process
- Cut all pieces to rough length, leaving 2 to 6 inches extra
- Cut one end at 45 degrees as your starting edge
- Place the mitered end against the starting wall
- Align the trim flush with the surface and mark the far end where the next corner begins
- Add a directional arrow showing which way the miter faces
Cut Using the Blade, Not the Laser
• Do not trust the laser guide, as it can be off by up to 1/8 inch
• Set the saw to 45 degrees
• Position the trim so the pencil mark aligns with the actual blade teeth
• Lower the blade slowly without spinning to verify alignment
• Make the cut only when the blade bisects the mark
Test-fit the piece. It should slide into place with no gaps. Glue only the edge touching the surface (such as a countertop), not the miter joint, to allow for minor movement.
Handling the Final Piece with the Reverse Marking Trick
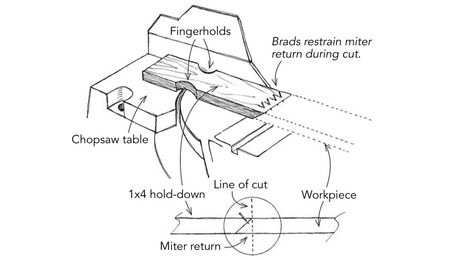
The last piece in a perimeter run often won’t close properly using standard marking because of cumulative errors.
Flip and Mark the Outside Edge
• Reverse the trim piece by flipping it around
• Mark the outside edge instead of the inside
• Add your directional arrow
• Cut and test-fit the piece
This reversal compensates for small misalignments and ensures the joint closes tightly. If needed, make micro-adjustments with sandpaper or a file.
Installation, Gluing, and Finishing Like a Professional
Installation order and finishing details make the difference between amateur and professional results.
Nail and Glue in the Right Sequence
- Dry-fit all pieces first
- Apply wood glue to miter joints (optional but adds strength)
- Hold the joint in place and secure with 18-gauge, 2-inch finish nails
- Sink nail heads with a nail set
- Let glue cure fully before sanding or painting
For off-wall pre-assembled joints, allow 24 hours for full bond strength.
Eliminate Gaps and Polish the Finish
Even perfect cuts can show gaps due to wall irregularities. Smart finishing makes them disappear.
Fill and Caulk Strategically
• Use wood filler for nail holes and minor surface flaws
• Apply caulk to joints, especially where trim meets wall
• Two coats of caulk are often needed on uneven drywall
• Sand lightly after drying, going easy on veneer edges to avoid sanding through
Break Sharp Edges for a Refined Look
Fresh cuts leave razor-sharp corners. Use one of these tools:
• A small radius block plane
• 120-grit sandpaper
• A roundover router bit
A soft edge feels better and reflects light more naturally, enhancing the trim’s appearance.
Paint for a Seamless Final Look
• Paint the wall first, then the trim
• This ensures a crisp line where paint meets trim
• After painting, caulked joints blend in and become nearly invisible
Troubleshooting Common Trim Cutting Problems
Even with careful preparation, issues can arise. Here’s how to fix them quickly.
Gap at the Corner?
• Recheck the miter angle and verify your saw is set to exactly 45 degrees
• Use a combination square or digital angle finder to confirm
• If the gap is small, lightly file or sand the mating edge to close it
Saw Won’t Cut Tall Trim?
For 7.25-inch baseboards on a 12-inch saw:
• Tilt the saw head to 45 degrees and cut with the trim laid flat
• Or use the bevel-cut method with 0-degree miter and 45-degree tilt
Blade Tear-Out Issues?
• Replace dull blades; a sharp 80-tooth fine-cut blade prevents splintering
• Cut with the good face down if using lower-quality molding to hide tear-out
Test First, Cut Later
Always use a scrap piece to test angles and settings. Keep test cuts labeled for future reference.
Frequently Asked Questions About Cutting Trim with a Miter Saw
What is the best miter saw angle for cutting baseboard corners?
The standard angle for baseboard corners is 45 degrees per piece, which creates a 90-degree joint when two pieces are joined. Always verify your saw’s accuracy with a combination square before cutting final pieces.
Can you cut 7.25-inch baseboards with a 12-inch miter saw?
Yes, but you need to adjust your technique. Tilt the saw head to 45 degrees and cut with the trim laid flat, or use the bevel-cut method with a 0-degree miter and 45-degree bevel to accommodate height limitations.
Should you glue miter joints on baseboards?
Gluing miter joints is optional but adds significant strength. For off-wall pre-assembly, glue both mating surfaces and allow 24 hours for full cure. For cabinet trim, glue only the edge contacting the surface, not the miter joint itself.
How do you fix gaps in miter saw trim joints?
Small gaps can be closed by lightly filing or sanding the mating edge. For larger gaps, recheck your saw’s 45-degree setting with an angle finder. Caulk and wood filler can hide minor imperfections after installation.
Why is my miter saw laser guide inaccurate?
Laser guides on miter saws can be off by up to 1/8 inch due to vibration, blade deflection, or improper calibration. For fine trim work, always align your pencil mark with the physical blade teeth rather than relying on the laser.
What blade is best for cutting trim with a miter saw?
An 80-tooth fine-cut blade produces the cleanest cuts with minimal tear-out. Sharp blades are essential for accurate cuts and splinter-free edges, especially on veneered or painted trim.
Key Takeaways for Cutting Trim with a Miter Saw

Mastering how to cut trim with a miter saw comes down to preparation, precision, and using the right technique for each situation. Always assemble inside corners off the wall to compensate for imperfect drywall, and use the bevel-cut method when working with thick baseboards that exceed your saw’s capacity. The “Mark and Cut” approach eliminates measurement errors on irregular installations and ensures tight joints every time.
Start by gathering your tools, reviewing safety protocols, and practicing on scrap pieces. Test your saw’s 45-degree setting, label your test cuts, and work systematically around the room from left to right. With these professional techniques in your toolkit, you’ll achieve gap-free joints and a finish that looks like it was done by a seasoned carpenter.