A single careless drop into a crowded toolbox can chip a carbide tooth, dull a precision edge, or destroy a premium blade beyond repair. If you value your woodworking tools, investing in smart saw blade storage ideas is one of the most practical upgrades you can make to your workshop. The right system prevents damage, extends blade life, and keeps your most-used accessories organized and ready.
In this guide, you’ll discover proven DIY and commercial methods for storing everything from 10-inch table saw blades to stacked dado sets. You’ll learn how to build a vertical wooden holder using your own saw, construct wall-mounted racks, and choose the right approach based on your collection size and workshop space.
Vertical Wooden Block Storage
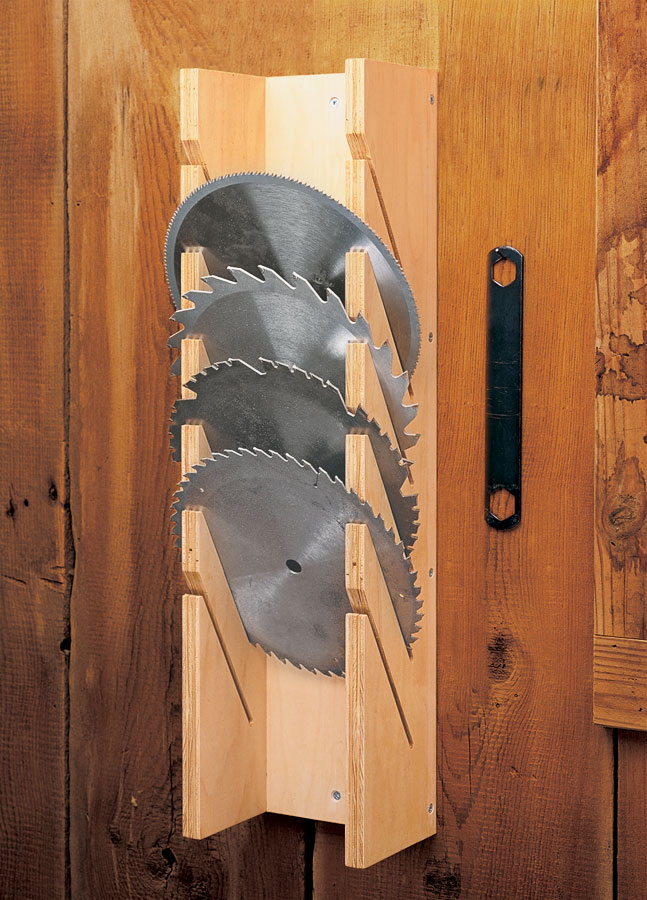
A space-saving method that keeps blades standing on edge with zero tooth contact. This approach works beautifully for small to medium collections and uses materials you likely already have on hand.
Build a Precision Slot Holder
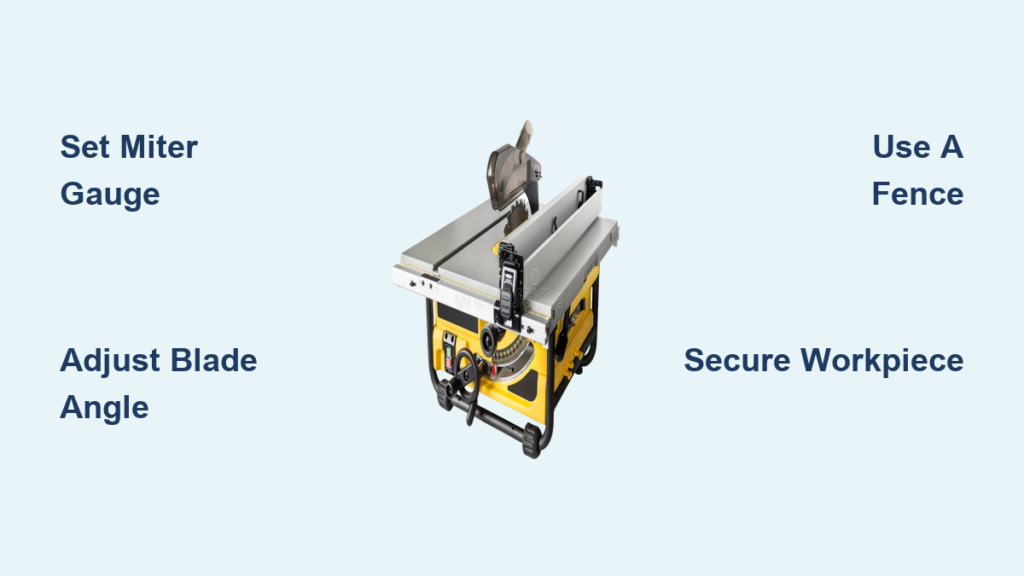
Create a custom wooden block with a perfectly sized slot for each blade using your table saw as the cutting tool. This ensures the cut matches your blade’s radius exactly, preventing carbide tips from touching wood. Use scrap hardwood like Sapeli for durability, or repurpose MDF or plywood. Cut a block about 20 cm long and tall enough to fit your storage space (around 32 cm high works well). Mark the centerline, clamp the block securely to the fence, then raise the blade slowly, turning the height knob one revolution at a time, until it cuts through the block.
Pro Tip: Count the turns from the bottom to control depth. Stop before the teeth reach the base to avoid damage.
Prevent Hub Damage with Spacers
Blades often have different arbor sizes, commonly 5/8-inch or 1-1/4-inch. To make one holder fit multiple blades, install a flathead screw in the slot’s base as an adjustable spacer. This pushes the blade out slightly, accommodating larger hubs without wobbling. Test fit each blade to ensure stability and no vibration.
Add Stability and Finish for Long Life
Glue small wooden blocks to the sides of the main holder to prevent tipping. Sand all surfaces smooth and apply linseed oil with grain guard to protect against moisture and splinters. This finish also gives a professional look and extends the life of the wood.
Safety Note: Always clamp the wood block at the corners, never over the blade path, to avoid kickback during cutting.
Store Multiple Blades in One Unit
A single vertical block can hold four or more blades side by side. Designate slots for:
- Rip blades (24 to 30 teeth)
- Combination blades
- Thin-kerf carbide options like Freud or Forrest
- Stacked dado sets, which need wider slots
Label each slot for quick identification.
Horizontal Drawer and Tray Systems

Ideal for large collections, offering high-density storage with full protection. These systems work best when you have many blades to organize and dedicated cabinet space available.
Build MDF Blade Trays with Dado Slots
For workshops with many blades, construct removable trays from MDF with 1/8-inch hardboard tops. Cut dado grooves into the tray sides to create individual slots, each sized precisely for a blade’s diameter. The hardboard adds strength and reduces wear. These trays slide into a cabinet mounted under your table saw extension or inside a tool cabinet.
Time Estimate: 2 to 3 hours for a 6-blade tray system.
Replicate Premium Plastic Holders in Wood
Many high-end blades like Forrest or Freud come in molded plastic holders that cradle the blade and protect teeth. Instead of buying expensive replacements, build wooden versions using the same slot principle. These allow stacking on shelves and prevent edge-to-edge contact.
Cost-Saving Tip: One DIY wooden holder costs under $5 in materials versus $15 to $25 for commercial plastic cases.
Organize by Blade Type in Drawers
Use drawer inserts to separate:
- 10-inch table saw blades
- 8-inch fine-tooth blades
- Circular saw blades
- Dado stacks
Group by function: rip, crosscut, plywood, or finish cutting. This reduces search time and prevents mismatched blade swaps.
Ergonomic Design: Leave enough space between trays so you can grab the blade’s outer rim without touching teeth. Finger holes are optional but not always necessary.
Wall-Mounted and Pegboard Racks
Maximize vertical space and keep frequently used blades within reach. These solutions work well in shops with limited drawer space but open wall area near the saw.
Install a Bolt-and-Separator Hanging Rack
Cut a 1/4-inch thick backing board to fit your wall or pegboard. Drill a central hole matching your arbor size (5/8-inch is common). Insert a bolt through the back and secure with a nut. Slide blades onto the bolt, separating each with a cardboard disc cut to the same diameter. This prevents metal-on-metal contact and allows air circulation.
Capacity: One rack can safely hold 6 or more blades.
Label for Instant Identification
Mark each slot with blade type:
- “Rip, 24T”
- “Crosscut, 40T”
- “Plywood, 80T”
- “Dado Stack”
Use waterproof labels or engrave directly into the wood for durability.
Protect Teeth with Optional Covers
For long-term wall storage, add a clear acrylic cover or hang the rack inside a shallow cabinet. This keeps out dust and prevents accidental contact during movement in the shop.
Critical Safety Check: Ensure the wall mount is anchored into studs or use heavy-duty toggle bolts. A full rack can weigh over 10 lbs.
Use the Drill-and-Hold Method on Solid Wood
Mount a sanded hardwood board directly to the wall. Drill holes at marked positions; depth should stop before the blade teeth touch the surface. Insert blades directly into the holes. Add washers between the blade hub and bolt head to prevent crushing the center metal.
Best For: Shops with limited drawer space but open wall area near the saw.
Protective Wrapping and Box Storage
Simple, low-cost solutions for occasional or spare blades. These methods require minimal fabrication and work well for backup blades or specialty tools used infrequently.
Wrap Blades in Convoluted Tubing
Use 3/8-inch convoluted plastic tubing (Hopkins 39035 is a popular choice) to fully encase blades. This method, borrowed from automotive wire protection, shields teeth from impact and protects hands during handling. The tubing is flexible, reusable, and allows safe stacking in drawers or boxes.
Why It Works: Even if wrapped blades touch, the plastic absorbs shock and prevents chipping.
Store in Original Packaging
If you own only 1 to 3 blades, keeping them in their original cardboard boxes is practical. Place boxes upright on a bottom shelf or in a designated tool bin. This method is ideal for:
- Spare blades
- Infrequently used specialty blades
- Newly purchased blades awaiting sharpening
Limitation: Cardboard offers minimal crush protection, so avoid stacking heavy items on top.
Use Dedicated Metal Drawers
A heavy-duty metal drawer acts as a secure vault for sharpened blades. Line the bottom with foam or felt to reduce vibration. This is a great transitional solution after professional sharpening, especially if blades are wrapped in protective film.
Pro Tip: Apply a thin coat of paste wax to blades every six months before storage to prevent rust.
Creative DIY Adaptations
Repurpose everyday designs for smart, portable blade storage. These creative solutions add personality to your shop while solving real organizational challenges.
Convert a Beer Caddy into a Blade Carrier
Wooden beer caddies have evenly spaced slots perfect for saw blades. Modify one by adjusting slot width to fit 10-inch blades. Add a handle for portability. This compact unit fits neatly in drawers or on shelves and makes swapping blades between jobs easier.
Customization Ideas:
- Paint or label each slot
- Add rubber feet to prevent sliding
- Use for circular saw blades (7-1/4 inch)
Stackable Tray Design for Small Shops
Build multiple shallow trays that nest vertically. Each tray holds 2 to 3 blades and slides out like a file cabinet. Store the entire stack on a shelf near your saw. This minimizes footprint while maximizing access.
Design for Compatibility and Safety
Ensure your storage works with all your tools and prevents accidents. A well-designed system accounts for the variety of blades in your collection.
Accommodate Different Arbor Sizes
Not all saws use the same center hole. Common sizes include:
- 5/8-inch: Craftsman and many contractor saws
- 1-1/4-inch: Shopsmith Mark V/500
Solutions:
- Use adjustable screws in vertical holders
- Drill oversized holes with removable bushings
- Store modified blades (bored out to 1-1/4 inch) in dedicated slots
Fit All Blade Types and Kerfs
Storage must handle:
- Full-kerf blades with wider bodies
- Thin-kerf blades like Freud or Irwin
- Stacked dado sets up to 13/16 inch thick
Widen slots or trays accordingly. Never force a thick blade into a tight space.
Prioritize User Safety
Avoid designs that require touching teeth during insertion or removal. Opt for:
- Hub-first insertion
- Rim gripping at the outer edge
- Full-tooth coverage with tubing or wrapping
Stability Warning: Wall-mounted units must be perfectly level and securely fastened. An unbalanced load can cause the entire rack to detach.
Step-by-Step: Build Your Own Storage System

Follow this workflow to create a custom, long-lasting solution. Taking time to plan upfront saves frustration and ensures your system meets your actual needs.
Audit Your Blade Inventory
List all blades by:
- Diameter (8 inch, 10 inch)
- Arbor size
- Tooth count
- Type (rip, crosscut, dado)
- Frequency of use
This determines whether you need vertical, horizontal, or hybrid storage.
Choose Materials Based on Budget
| Method | Materials | Cost | Effort |
|---|---|---|---|
| Vertical block | Scrap hardwood, oil | $0 to $10 | Medium |
| Wall rack | 1/4 inch board, bolt, washers | $5 to $15 | Low |
| MDF tray | MDF, hardboard, glue | $15 to $25 | High |
| Tubing wrap | Convoluted plastic | $20 for 10 ft | Low |
| Commercial case | Plastic holder | $15 to $25 each | None |
Build the Vertical Slot Holder
- Cut a hardwood block: 20 cm long by the height of available space.
- Mark centerline for alignment.
- Clamp block to table saw fence.
- Raise blade slowly, one turn per cut, until slot depth matches blade radius.
- Test fit: blade should sit securely with no tooth contact.
- Add flathead screw for arbor adaptation.
- Seal wood with linseed oil and grain guard.
Assemble a Wall Rack with Separators
- Cut 1/4-inch backing board to desired length.
- Drill center hole(s) matching arbor size.
- Insert bolt and secure with nut on back.
- Cut cardboard circles (same diameter as blade).
- Slide blade, add separator, repeat.
- Hang from pegboard or wall hook.
Apply Final Protection Steps
- Wax blades every 6 months
- Label all slots clearly
- Mount units securely
- Keep away from moisture
Frequently Asked Questions About Saw Blade Storage Ideas
What is the best way to store saw blades long term?
The best long-term storage method keeps blades completely separated with no tooth-to-tooth contact. Vertical wooden slot holders, wall-mounted racks with cardboard separators, and convoluted tubing wraps all provide excellent protection. Apply paste wax every six months to prevent rust, especially in humid environments.
Can I store saw blades in their original cardboard boxes?
Yes, original cardboard boxes work fine for spare or rarely used blades. Place them upright on a bottom shelf where they won’t be crushed by heavy items. However, this method offers minimal impact protection, so avoid stacking tools on top of the boxes.
How do I prevent carbide teeth from chipping during storage?
Prevent chipping by ensuring blades never touch each other or hard surfaces. Use slot holders that match your blade’s radius exactly, install cardboard or foam separators between stacked blades, or wrap each blade in convoluted plastic tubing. The key is eliminating any metal-on-metal contact.
What materials work best for DIY blade storage?
Scrap hardwood like Sapeli offers excellent durability for vertical holders. MDF with 1/8-inch hardboard tops works well for horizontal trays. For wall racks, a 1/4-inch plywood backing provides sufficient strength. Avoid particle board, which absorbs moisture and lacks structural integrity.
How do I store different arbor sizes in one system?
Accommodate multiple arbor sizes by installing flathead screws as adjustable spacers in vertical slots, or drilling oversized holes with removable bushings in wall racks. Some woodworkers bore out smaller blades to fit larger arbors, so design your storage to handle these modified sizes.
Are commercial plastic blade holders worth the cost?
Commercial plastic holders from brands like Freud or Forrest provide excellent protection but cost $15 to $25 each. For woodworkers with multiple blades, building wooden replicas costs under $5 each and offers comparable protection. Commercial holders make sense for single premium blades or warranty-protected tools.
Key Takeaways for Organizing Your Saw Blade Collection

Effective saw blade storage ideas combine three essential elements: protection from physical damage, prevention of moisture and rust, and easy access to the blades you use most. Vertical wooden blocks offer the best space efficiency for small shops, while horizontal tray systems excel for large collections. Wall-mounted racks keep frequently swapped blades visible and within reach.
Start by auditing your inventory and identifying your most-used blades. Build one vertical slot holder using your table saw as the cutting tool, then expand your system as your collection grows. Apply paste wax every six months, keep blades dry, and always handle them by the hub or outer rim. With the right storage approach, your blades will stay sharper, last longer, and deliver cleaner cuts on every project.