Cutting glass with a saw sounds intimidating, especially if you’re staring at a stubborn pane that needs resizing. Most DIYers assume glass cutting requires specialized equipment or professional help. The truth is, with the right tools and technique, you can cut glass with a saw at home safely and accurately.
This guide walks you through everything you need to know about how to cut glass with a saw. You’ll discover which saws and blades work best, how to prepare your workspace, step-by-step cutting methods, and critical mistakes to avoid. Whether you’re tackling a craft project or a home renovation, you’ll gain the confidence to get clean, precise results.
Identify the Right Glass Type Before Cutting
Before learning how to cut glass with a saw, you must confirm your glass is safe to modify. Not every glass type can be cut after manufacturing.
Check for Tempered Glass Markings
Tempered glass shatters instantly when cut, so identifying it is critical. Look in the corners of your glass pane for a small etched label. Common markings include:
- “Tempered”
- “Temp”
- A manufacturer’s certification stamp
If you spot any of these, stop. Do not attempt to cut the glass with any saw.
Choose Annealed Glass for DIY Projects
Annealed glass, also called float or standard glass, is untreated and safe to cut. You can find it at most hardware stores in sheets or pre-cut panels. This is the only type of glass you should attempt to cut with a saw at home.
Pro Tip: Buy glass slightly larger than your final dimensions. You can trim it precisely before sending it to a professional tempering facility if needed.
Select the Best Saw and Blade for Glass
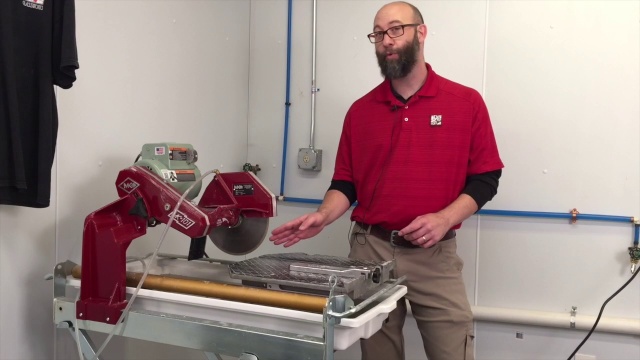
Using the wrong tool is the fastest way to ruin glass or injure yourself. The right equipment makes all the difference.
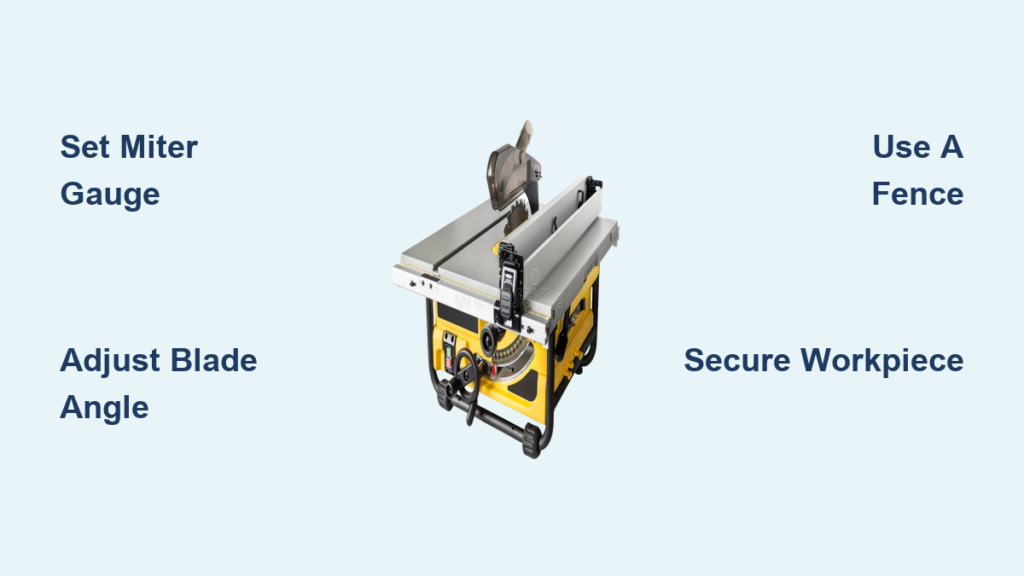
Use a Wet Tile Saw for Cleanest Results
A wet tile saw is the most effective power tool for cutting glass. It uses water to cool the blade and minimize dust. This produces smoother, more precise cuts than dry cutting methods. Wet saws are commonly used for ceramic, porcelain, and glass tiles alike.
Pick a Diamond-Grit Blade
Glass is hard but brittle, so you need a blade designed for the job. Look for these features:
- Diamond-impregnated edge for cutting without cracking
- Continuous rim design for smoother finishes
- Packaging that confirms compatibility with glass or tile
Avoid these blade types:
– Carbide-tipped blades (made for wood and metal)
– Abrasive wheels (too rough and cause fractures)
Recommended blade size: 4-inch or 7-inch, depending on your saw model.
Set Up a Safe Workspace
Cutting glass produces sharp fragments and fine particles. A proper setup protects you and improves cut quality.
Wear Essential Safety Gear
Always put on protective equipment before starting. You need:
- Safety goggles to shield your eyes from flying shards
- Cut-resistant gloves to protect your hands
- A dust mask or respirator to avoid inhaling particles
- Long sleeves and pants to minimize skin exposure
Create a Stable Cutting Area
Place your saw on a level, sturdy surface that won’t shift during operation. Fill the water reservoir before powering on the tool. Keep a bucket and damp cloth nearby for quick cleanup. Place non-slip matting under the glass to prevent movement.
Warning: Never operate a saw without the blade guard or protective cover in place.
Measure and Mark Your Cut Line
Precision matters when cutting glass. Small measurement errors can ruin an entire piece.
Mark Clearly with the Right Tool
Use a glass marker or Sharpie to draw your cut line on the surface. Double-check measurements from every side before proceeding. Hold a straight edge or metal ruler against the line as a guide.
Score Lightly for Thicker Glass (Optional)
Saws don’t require pre-scoring, but a light score can help guide the blade on thicker pieces. Use a standard glass cutter and apply gentle pressure in one smooth stroke. Wipe the line with alcohol to improve visibility. Do not snap or break the glass at this stage. Scoring serves only as a visual aid.
Follow Step-by-Step Cutting Instructions
Now you’re ready to make the cut. Follow these steps carefully for the best results.
Start the Water Flow First
Turn on the water pump before powering the saw. Adjust the flow so the blade stays consistently wet throughout the cut. Water prevents overheating and controls dust at the same time.
Feed the Glass Slowly and Steadily
- Let the blade reach full speed before making contact.
- Gently push the glass into the blade along your marked line.
- Apply light, steady pressure and let the blade do the work.
- Keep your hands well away from the blade path.
Speed Tip: Moving too fast causes chipped edges. Moving too slow causes overheating. Aim for a steady pace of about 1 to 2 inches per second.
Finish the Cut Smoothly
Continue feeding the glass until the entire piece separates. Turn off the saw and wait for the blade to stop completely before removing the glass. Handle the cut piece carefully because the edges will be very sharp.
Visual Cue: A successful cut produces a clean, straight edge with minimal chipping along the line.
Troubleshoot Common Cutting Problems
Even experienced DIYers encounter issues. Here’s how to solve the most frequent problems.
Fix Chipped or Cracked Edges
Chipping usually points to one of three causes:
– A dull or incorrect blade
– Excessive pressure during cutting
– Uneven support under the glass
Replace the blade if it shows wear. Make sure the glass sits flat across the table with full support. Reduce your feed speed to give the blade more time to work.
Resolve Blade Binding or Stalling
Binding happens when the blade struggles to move through the glass. Common causes include insufficient water cooling or twisting the glass mid-cut. Check that water flows steadily onto the blade. Keep the glass aligned with the fence and avoid angling it during the cut.
Smooth and Finish the Cut Edges

Freshly cut glass has razor-sharp edges that need finishing for safety and appearance.
File Down Sharp Edges
Use a carborundum stone or diamond file to smooth the edges. Work in one consistent direction for even results. Always wear gloves during this step to protect your hands.
Wet Sand for a Polished Finish
For a smoother, professional look:
- Start with 150-grit wet/dry sandpaper.
- Dip the paper in water and sand along the edge.
- Progress to 320 grit, then 600 grit for a polished surface.
Pro Tip: A handheld rotary tool with a glass-polishing bit speeds up the finishing process significantly.
Understand Why Tempered Glass Cannot Be Cut
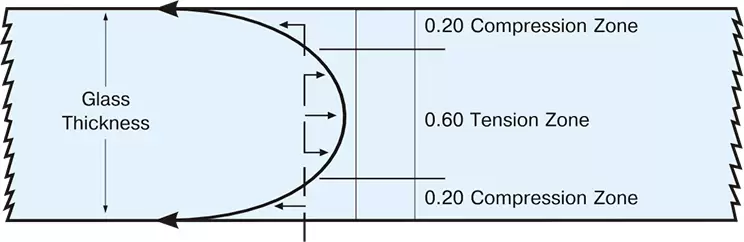
This point deserves emphasis: you cannot cut tempered glass with any saw after manufacturing.
The Science Behind the Shatter
Tempered glass is about four to five times stronger than regular glass. Manufacturers achieve this strength by heating the glass to high temperatures, then rapidly cooling it. This process creates surface compression and internal tension that holds the glass together.
Any surface breach, including saw contact, disrupts this balance. The stored energy releases instantly, causing the glass to explode into small, granular pieces.
Real-World Consequence: Attempting to cut tempered glass risks serious injury from flying shards and renders the glass completely unusable.
Consider Professional Cutting Services for Custom Needs
If you need custom shapes or tempered glass modifications, professional help is the only safe option.
Work with a Glass Fabricator
A professional fabricator cuts glass before tempering using precision equipment. They use CNC machines for accurate shapes and complex designs. After cutting, they temper the piece in a furnace to restore its strength.
Typical cost: $20 to $50 per cut, depending on complexity.
Typical timeframe: 1 to 3 days for most orders.
This is the only safe way to obtain custom-sized tempered glass.
Compare Glass Cutting Methods
Different tools suit different needs. Knowing your options helps you pick the right approach.
| Method | Best For | Can Cut Tempered? | Safety Level |
|---|---|---|---|
| Wet Tile Saw | DIY straight cuts | No | High with precautions |
| Glass Cutter | Thin annealed glass | No | Medium |
| Dremel with Diamond Bit | Curved cuts and etching | No | Medium |
| CNC Waterjet | Custom shapes, thick glass | Before tempering only | High for professionals |
Bottom Line: For DIY projects, a wet tile saw offers the best balance of accuracy, control, and safety when working with annealed glass.
Handle Cut Glass Safely After Cutting

Glass remains fragile even after a successful cut. Proper handling prevents breakage and injury.
Do’s and Don’ts for Glass Handling
Do:
– Store cut glass on a flat, padded surface
– Lift with two hands, supporting the full weight
– Wrap edges temporarily in tape for protection
Don’t:
– Stack cut glass without padding between pieces
– Place stress on the cut edges
– Carry glass vertically in windy conditions
Maintain Your Saw for Long-Term Performance
A well-maintained saw delivers cleaner cuts and lasts longer. Regular care pays off.
Clean the Saw After Every Use
Drain and rinse the water tray to remove glass slurry. Wipe down the table and inspect the blade for wear or warping. Proper cleaning prevents buildup that affects future cuts.
Replace Blades When Needed
A diamond blade typically lasts 10 to 20 cuts, depending on glass thickness. Watch for these warning signs:
– Slower cutting speed
– Increased chipping on edges
– Unusual vibration during operation
Tip: Label blades by material type to avoid cross-contamination. Never use a glass blade on stone or vice versa.
Frequently Asked Questions About Cutting Glass with a Saw
Can you cut tempered glass with a saw blade?
No. Tempered glass cannot be cut with a saw blade after the tempering process. The internal stress causes the glass to shatter instantly into small, sharp pieces. You must cut the glass before tempering if you need a custom size.
What type of saw cuts glass best?
A wet tile saw with a diamond-grit blade is the best option for most DIY projects. The water cools the blade and reduces dust, while the diamond edge cuts cleanly through annealed glass without cracking.
How thick of glass can you cut with a wet saw?
Most wet tile saws handle glass up to about 1 inch thick. Thicker glass may require specialized equipment like a CNC waterjet. Always check your saw’s specifications before attempting thick cuts.
Do you need water when cutting glass with a saw?
Yes. Water cooling is essential when cutting glass with a power saw. It prevents overheating, reduces dust, and produces cleaner cuts. Never attempt dry cutting on glass with a power tool.
How do you know if glass is tempered?
Look for a small etched label in the corner of the pane. It usually says “Tempered,” “Temp,” or shows a manufacturer’s certification mark. Tempered glass also breaks into small granular pieces rather than sharp shards if it does break.
Can you cut glass with a Dremel tool?
Yes, a Dremel with a diamond bit can cut glass, especially for curved cuts or detailed etching work. However, it works best on thinner glass and requires a steady hand. Always use water for cooling and wear proper safety gear.
Key Takeaways for Cutting Glass with a Saw
Learning how to cut glass with a saw opens up new possibilities for DIY projects, but success depends on respecting the material’s limitations. Always confirm your glass is annealed before attempting any cuts. Use a wet tile saw with a diamond blade for the cleanest results, and never rush the process.
Remember these critical points:
– Only cut annealed (non-tempered) glass
– Use a wet tile saw with a continuous-rim diamond blade
– Work slowly, steadily, and with full safety gear
– Finish all edges to prevent cuts and injuries
– Never attempt to cut tempered glass with any saw
Most DIY glass cuts take under 30 minutes from setup to finished edge. With the right approach, you can achieve professional-quality results at home. When in doubt, especially for tempered glass or complex shapes, consult a professional glass shop to ensure safety and precision.