You walk up to a stubborn corner with trim in hand, and nothing fits. The walls are slightly off, the angle is not quite 90 degrees, and your miter saw sits in a workshop miles away. Cutting miters without a miter saw is not a compromise. It is often the smarter path to cleaner joints, especially when walls refuse to cooperate or your workspace barely fits a workbench.
This guide walks through proven techniques using scrap wood, hand saws, and planes to produce gap-free miters. You will learn how to transfer real angles directly from the corner, saw with precision using body mechanics, and refine cuts with simple jigs. By the end, you will see why many experienced woodworkers prefer these methods over fixed guides.
Use Scrap Wood to Transfer Angles

The most reliable way to cut miters without measuring degrees is to let the corner itself define the angle. This geometric transfer method bypasses protractors and guesswork, delivering exact fits even on crooked walls.
Fit Inside Corners with Scrap Blocks
When an inside corner opens wider than 90 degrees (obtuse), standard 45-degree miters leave gaps. Here is how to fix it:
1. Cut two identical scrap pieces matching your trim’s width.
2. Slide one scrap flush against one wall, extending into the corner.
3. Press the second scrap against the opposite wall and slide it down until it touches the first.
4. Mark where the two scraps meet.
5. Draw a line from that mark to the wall corner.
This line is your true miter angle. Cut both trim pieces along this line for a gap-free fit.
Handle Outside Oblique Corners
For outside corners that flare wider than 90 degrees:
1. Place one scrap piece along each wall so they overlap at the corner.
2. Mark the outer edge where the scraps intersect.
3. Flip or view from behind and mark the inner point where scraps meet the walls.
4. Connect both marks with a straight line.
This becomes your cutting guide. Both pieces cut to this line will form a seamless joint.
Adapt for Acute Outside Corners
Even if a corner looks square but is actually acute (less than 90 degrees), the overlap method works:
1. Lay each scrap against its wall, allowing them to cross.
2. Mark the outer intersection and the inner wall contact point.
3. Draw a line between the two.
This eliminates guesswork and ensures both pieces meet cleanly, regardless of wall alignment.
Fix Tight Inside Acute Corners
Acute inside corners are tricky because standard square cuts leave gaps. Use this modified method:
1. Cut a slight angle (about 5°) on the end of one scrap piece.
2. Slide it into the corner, flush with one wall.
3. Rest the second scrap against the other wall, letting it rest on top of the angled piece.
4. Mark where the second scrap contacts the first.
5. Draw a line from that mark to the wall corner.
This line gives the correct miter. Cut both trim pieces to match. No gaps, even in tight spaces.
Cut Miters by Hand with Precision
When geometry is not enough, precise hand sawing delivers clean miters. This method excels for custom angles, thick stock, or fine joinery like box corners.
Choose the Right Saw and Setup
Use a 20-inch backsaw or fine-tooth dovetail saw for clean, controlled cuts. The blade must be sharp. Dull teeth wander and tear wood fibers. Support your work with a bench hook or clamp it to a workbench. A stable setup prevents movement and keeps cuts accurate.
Marking is critical. Replace pencils with a marking knife. It scores a clean line across grain and edge, giving the saw a precise track to follow. For standard 45-degree miters, use a combination square or try square to scribe the line fully around the board.
Start the Cut with Control
Begin on the far side of the board:
– Pull the saw back gently, using light pressure.
– Guide the blade with your off-hand thumb or knuckle to prevent drift.
– Take the weight off the saw and let it glide along the knife line.
Create a shallow starter kerf halfway across the board. Flip to the near side and repeat. Connect both starter cuts to form a continuous guide.
Finish with Full-Blade Strokes
Once the kerf is established:
– Use the full length of the saw (not just the tip).
– Maintain a slow, steady rhythm.
– Keep your arm aligned with the cut line.
Avoid forcing the saw. Let the teeth do the work. A clean, plumb cut results from patience and alignment, not power.
Align Your Body for Accuracy
Your stance affects cut quality:
– Stand with feet wide for balance.
– Press your hip into the workbench to anchor your body.
– Shift shoulders left or right to keep your arm, elbow, and forearm in line with the cut.
This minimizes saw deflection. Watch the line continuously. A slight curve in the starter cut helps maintain the path.
Verify with a Bevel Gauge
After cutting, check the angle:
– Set a bevel gauge to the cut edge.
– Flip it to the mating piece. No gaps mean a perfect fit.
If there is a gap at the front or back, the angle is off. Minor errors can be corrected with sanding or planing.
Refine Miters with a Shooting Board

Even the best hand-cut miters need fine-tuning. Planing removes saw marks and adjusts angles for invisible joints, especially vital for cabinetry, frames, or thin materials.
Use a Donkey’s-Ear Shooting Board
This jig holds the workpiece at a fixed angle while guiding a hand plane across the edge. For 45-degree miters:
– Set the jig to 45°.
– Clamp the board in place.
– Run a block plane or bench plane along the edge, held flat on its side.
The plane shaves a consistent amount, ensuring a smooth, dead-on angle. It is ideal for small parts like dice tower slats or picture frames.
Plane Miters Freehand When No Jig
Experienced woodworkers can plane miters without a jig:
– Mark the desired angle clearly.
– Use a sharp block plane.
– Take light, incremental passes.
– Check progress frequently with a square or bevel gauge.
Freehand planing demands practice but offers flexibility for odd angles.
Sand for Final Smoothing
For power tool users, a belt sander or disk sander can refine miters:
– Clamp a scrap wood block at 45° to act as a guide.
– Hold the workpiece against the block and sand slowly.
– Avoid overheating or removing too much material.
Finish with hand sanding (180–220 grit) for a polished edge. Never rely on sanding alone to create the angle. Use it only for final touches.
Select the Best Tools for the Job
Your tools make or break the result. Choose wisely, especially when skipping the miter saw.
Invest in a Quality Hand Plane
- Budget planes (e.g., Harbor Freight): Cheap but require heavy tuning. Often have uneven soles and dull irons.
- Vintage Stanley No. 4 or No. 5: Highly recommended. Durable, precise, and available used. Tuning one takes the same effort as a new budget plane but delivers far better results.
- Modern mid-tier planes (e.g., Lie-Nielsen, Veritas): Excellent out of the box, but costly.
Even a tuned vintage plane outperforms most new budget models.
Pick the Right Saw
- Backsaw or dovetail saw: Fine teeth (13–15 TPI) cut cleanly in hardwoods.
- Blade sharpness: A dull blade binds and splinters. Sharpen regularly with a file or honing guide.
- Handle comfort: Choose one that fits your grip for better control.
Essential Supporting Tools
- Marking knife: Scribes cleaner lines than pencils.
- Bevel gauge: Verifies angles post-cut.
- Clamps and scrap wood: Build jigs or hold workpieces.
- Chisel: Cleans up tear-out or adjusts fit.
Work in Tight Spaces with Thin Stock
Apartment woodworkers or those with limited tools face real challenges, especially with thin materials like 1/8″ plywood.
Build a Dice Tower with Hand Tools
For projects like dice towers:
1. Rough-cut slats with a handsaw or shallow miter box.
2. Refine angles using a shooting board or clamped jig with a block plane.
3. Test-fit before gluing and adjust with sandpaper or a plane.
4. Consider box joints if miters are too finicky. They are stronger and easier to cut by hand.
In such builds, visual fit matters more than mathematical perfection. A smooth, tight joint beats a “perfect” 45-degree cut with a gap.
Fix Common Miter Problems
Even careful work can go wrong. Here is how to troubleshoot:
| Issue | Cause | Solution |
|---|---|---|
| Gaps in joint | Angle error or out-of-square walls | Use sandpaper or chisel to trim high spots. Re-check angle with scrap method. |
| Splintering | Dull blade or wrong cutting direction | Sharpen saw. Use marking knife to score fibers first. Make shallow passes. |
| Uneven surface | Saw wandered off line | Re-align body with cut. Use full saw length. Finish with plane. |
| Inconsistent depth | No guide during planing | Use shooting board or scrap jig to stabilize plane or sander. |
Compare Methods: Tools vs. Skill

| Feature | Miter Box / Miter Saw | Hand Technique (Scrap/Planing) |
|---|---|---|
| Precision Source | Fixed guides | Operator skill, marking, alignment |
| Flexibility | Limited to 45°/90° | Any angle, any corner |
| Space Needed | High (tool + storage) | Low (saw, plane, bench hook) |
| Skill Required | Minimal | Moderate to high |
| Best For | Repetitive, standard cuts | Custom, out-of-square, thin stock |
| Finish Quality | Good (often needs cleanup) | Excellent (plane-smooth) |
Final Tips for Perfect Miters
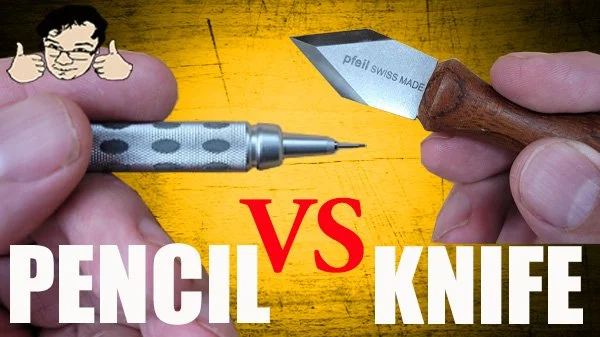
Mark with a Knife, Not a Pencil
A marking knife creates a clean groove the saw follows precisely. Pencil lines are thick and imprecise. Avoid them for fine work.
Always Use the Scrap Method for Trim
In older homes, walls are rarely square. Skip the protractor. Use two scrap pieces to transfer the real angle from the corner. It is faster and more accurate.
Refine Every Cut
Accept that sawing is just the first step. Planing or sanding brings the joint to perfection. A shooting board makes this easy and repeatable.
Buy Quality Hand Tools
A tuned vintage plane and sharp backsaw outperform a cheap miter box. Spend on tools that last. Your joints will show the difference.
Practice Body Alignment
Your stance and shoulder position dictate cut accuracy. Anchor your hip to the bench, align your arm, and let the saw follow the line. Precision is a skill. Develop it.
Frequently Asked Questions About Cutting Miters Without a Miter Saw
What is the easiest way to cut miters without a miter saw?
The easiest method is the scrap wood transfer technique. Place two scrap pieces in the corner, mark where they meet, and draw a line to the wall corner. Cut your trim to that line for a perfect fit every time.
Can you cut a 45-degree miter with a hand saw?
Yes. Use a backsaw or dovetail saw with fine teeth (13–15 TPI). Scribe the line with a marking knife, start with a shallow kerf, and use full strokes. A sharp blade and proper body alignment produce clean 45-degree cuts.
How do you cut miters on out-of-square corners?
Use the scrap wood method. Two identical pieces slid into the corner will reveal the true angle. Mark the intersection point and draw a line to the wall corner. This works for both acute and obtuse angles.
What tools do I need to cut miters by hand?
You need a backsaw or dovetail saw, a marking knife, a combination square or try square, a bench hook or clamps, and a hand plane for refinement. A bevel gauge helps verify angles after cutting.
Is a miter box worth it if I do not have a miter saw?
A miter box offers limited flexibility and takes up workspace. For most trim work and custom angles, the scrap wood method and hand sawing produce better results. A miter box is only worthwhile for repetitive 45-degree cuts.
How do I fix gaps in miter joints?
Gaps usually mean the angle is slightly off. Trim high spots with sandpaper or a chisel, then re-check with a bevel gauge. For out-of-square walls, redo the scrap wood method to find the true angle.
Key Takeaways for Cutting Miters by Hand
Cutting miters without a miter saw comes down to three core skills: transferring real angles with scrap wood, sawing with controlled body mechanics, and refining cuts with a plane or sander. These methods adapt to any corner, any material, and any workspace.
Start with the scrap wood technique on your next trim project. You will quickly see why so many woodworkers abandon fixed guides in favor of geometry and skill.