You’re shaping a delicate curve in a piece of molding or trimming a tight joint when the blade starts skipping, tearing, or refusing to bite. A dull or damaged coping saw blade can ruin your workpiece and waste valuable time. Learning how to replace a coping saw blade properly keeps your cuts clean, your tool in top shape, and your projects moving forward without interruption.
This guide covers every step of the process, from releasing frame tension and choosing the right replacement to installing, tensioning, and testing the new blade. You’ll also learn common mistakes to avoid and simple maintenance habits that extend the life of your saw. Whether you’re a beginner or a seasoned woodworker, these techniques will sharpen your results.
Release Tension on the Coping Saw Frame

Before touching the blade, you must loosen the frame. Skipping this step risks bent pins, snapped blades, or injury.
Locate the Tensioning Knob
Find the tensioning knob, which usually sits at the end of the handle or along the spine of the frame. Some models use a lever instead. This mechanism controls how tightly the blade is stretched between the two ends of the frame.
Loosen by Turning Counterclockwise
Rotate the knob counterclockwise until it spins freely. As you turn, the frame contracts slightly and the blade loses its tautness. Keep turning until the blade hangs loose with no resistance. Never try to remove a blade while tension is still applied.
Confirm the Blade Is Fully Slack
Press the blade gently with your fingertip. If it wobbles easily or shifts side to side, the tension is fully released. If you feel any tightness, continue turning the knob before proceeding.
Remove the Old Blade Safely
With the frame relaxed, the old blade comes out quickly. Handle it with care to avoid cuts.
Unhook the Blade from the Pins
Most coping saws hold the blade with small metal pins or slots at each end of the frame. Grip the blade near its center, well away from the teeth, and slide one end off its pin. Once one side is free, angle the blade and pull the second end clear.
Dispose of the Used Blade Properly
Even a dull coping saw blade can slice skin. Wrap the used blade in tape, paper, or cardboard before dropping it into a puncture-resistant container. Loose blades tossed in the trash are a common cause of workshop injuries.
Select the Correct Replacement Blade

Choosing the right blade makes the difference between a clean cut and a frustrating mess. Match the blade to your material and your saw.
Match the Teeth to the Material
Blade tooth count directly affects cut quality:
- Fine-tooth blades (14 to 20 TPI) work best for wood, plastic, and laminates, delivering smooth, splinter-free edges.
- Coarse-tooth blades (6 to 10 TPI) suit metal, thick hardwood, or fast aggressive cuts where finish matters less.
- Variable tooth patterns offer flexibility when switching between precision and speed.
Verify Blade Length Compatibility
Standard coping saw blades run between 5 and 6 inches long. Measure the distance between your saw’s blade pins or check the manufacturer’s specs. A blade that is too short won’t seat properly, and one that is too long will resist tensioning.
Confirm Teeth Face Forward Before Installation
This step is critical. Coping saws cut on the push stroke, so the teeth must point forward, toward the handle. Installing the blade backward produces zero cutting action, extra effort, and a high chance of blade jump or breakage.
Install the New Blade Correctly

Proper installation sets the foundation for accurate, safe cutting.
Seat One End First
Hook one end of the new blade onto the top or bottom pin. Make sure the flat side of the blade sits flush against the pin and the teeth point away from the frame. If the blade has a notched end, align it with the slot in the holder.
Thread and Secure the Second End
Pull the frame open slightly by hand to stretch the blade across. Slide the second end onto its matching pin until it seats fully. Both ends must lock into place before you apply any tension.
Keep the Blade Straight
Look along the blade to check for twists. A twisted blade cuts unevenly and may snap under load. Rotate the blade gently in its pins until it lies perfectly straight between the two holders.
Set the Right Blade Tension
Tension turns a floppy strip of metal into a rigid cutting edge. Finding the sweet spot takes a little practice.
Tighten the Knob Clockwise
Turn the tensioning knob clockwise to extend the frame and stretch the blade. Work slowly and apply even pressure, pausing to check tautness as you go.
Aim for Firm, Not Over-Tight
The ideal tension feels firm when plucked lightly, similar to a guitar string, but not so tight that it risks snapping. Under light finger pressure, the blade should resist deflection of more than 1 to 2 mm. Over-tightening stresses the frame and increases the chance of sudden blade failure.
Test for Stability
Run your finger along the blade carefully, away from the teeth, to confirm it is straight and secure. No wobble or twist should be visible when the blade is at rest.
Test the Saw Before Cutting Your Project
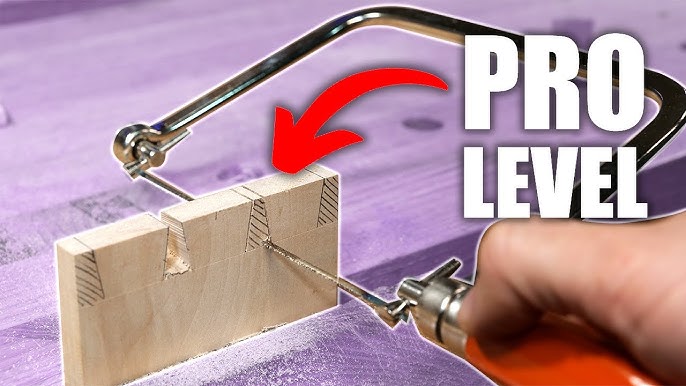
A quick test confirms the blade is ready for real work.
Perform a Pull Test
Gently tug the blade sideways to make sure both ends stay seated. If anything shifts, reseat the blade and retighten the tension.
Do a Visual Inspection
Check the following before you start cutting:
- Teeth still face forward
- Blade runs straight between the pins
- No kinks, bends, or twists are visible
- The tensioning knob is locked in position
Make a Trial Cut
Cut a scrap piece of your working material. The blade should start easily, track straight, and produce clean shavings. If it binds, skips, or veers off course, recheck tension and alignment before continuing.
Avoid Common Replacement Mistakes
Even experienced users slip up occasionally. Watch for these frequent errors.
Installing the Blade Backward
A backward blade won’t cut and may kick or jump dangerously during use. Always confirm teeth point forward before tensioning.
Failing to Seat the Blade Fully
If the blade ends aren’t fully hooked onto the pins, the blade can dislodge mid-cut. Visually confirm both ends are locked before tightening.
Setting the Wrong Tension Level
Too loose and the blade wanders, bends, or breaks under lateral pressure. Too tight and it snaps suddenly, especially when starting a cut or turning a corner. Aim for firm, not rigid.
Maintain Your Coping Saw for Longevity
Regular care keeps both blade and tool performing at their best.
Replace Blades at the First Sign of Dullness
Dull blades demand more force, which increases breakage risk and reduces cut accuracy. Swap out the blade when cutting feels sluggish, wood fibers tear instead of slicing cleanly, or the blade needs constant repositioning.
Inspect the Frame and Pins
Check the blade pins for bending or corrosion. Clean them with a small wire brush if needed. Make sure the tensioning knob turns smoothly. A stiff or stripped knob should be serviced or replaced.
Decide Whether to Store Under Tension
Modern coping saws are generally built to hold tension indefinitely. However, if you’re storing the saw for several months, releasing tension can help preserve the spring, especially on lower-cost models.
Frequently Asked Questions About Coping Saw Blades
Which direction should the teeth face when installing a coping saw blade?
The teeth must point forward, toward the handle. Coping saws cut on the push stroke, so forward-facing teeth engage the material as you push the saw away from your body. Backward teeth will not cut and may cause the blade to jump.
How do I know what size replacement blade I need?
Standard coping saw blades measure 5 to 6 inches long. Measure the distance between your saw’s blade pins or check the manufacturer’s specifications. A blade that does not match your frame will not seat or tension properly.
What is the difference between fine-tooth and coarse-tooth coping saw blades?
Fine-tooth blades have 14 to 20 teeth per inch and produce smooth, splinter-free cuts in wood, plastic, and laminates. Coarse-tooth blades have 6 to 10 teeth per inch and work better on metal, thick hardwood, or jobs where speed matters more than finish quality.
How tight should I tension a coping saw blade?
Tension the blade until it feels firm when plucked, similar to a guitar string. It should resist light finger pressure without deflecting more than 1 to 2 mm. Over-tightening can snap the blade, while under-tightening causes wandering and breakage.
How often should I replace my coping saw blade?
Replace the blade as soon as you notice dullness, missing teeth, or persistent wandering despite correct technique. Cutting that feels sluggish, tears wood fibers, or requires frequent repositioning all signal a worn blade.
Should I release tension when storing my coping saw?
Modern frames are designed to hold tension indefinitely, so leaving the saw tensioned is fine for short-term storage. For long-term storage lasting several months, releasing tension can reduce stress on the frame spring, particularly on budget models.
Key Takeaways for Replacing a Coping Saw Blade

Replacing a coping saw blade is a quick task that pays off in cleaner cuts and longer tool life. Always release tension before removing or installing a blade, choose a blade that matches your material and frame, and confirm the teeth face forward before tightening. Set firm but not excessive tension, then test the saw on scrap material before starting your project.
Keep a few spare blades on hand so a dull or broken blade never derails your work. Inspect your saw’s pins and tensioning knob regularly, and store the tool properly to extend its service life. With these habits, your coping saw will stay ready for any detailed cutting job that comes your way.