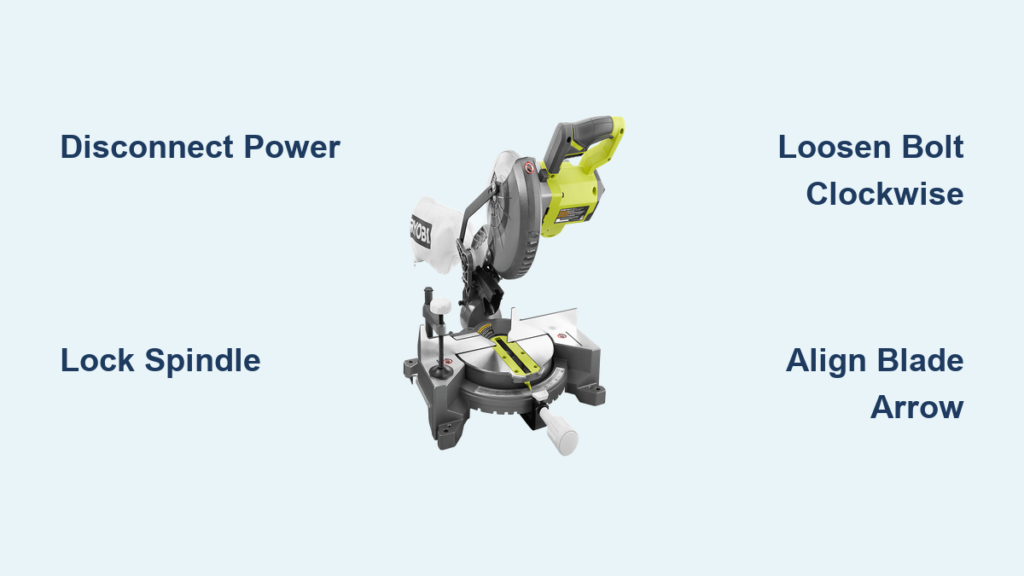
Cutting aluminum with a miter saw is doable, but it is far more dangerous than most woodworkers realize. Aluminum tends to grab high-speed blades, gum up teeth with melted residue, and eject hot shrapnel that can cause serious injury. Standard woodworking setups leave dangerous gaps, and the wrong blade can fail catastrophically in seconds.
This guide covers the exact techniques, blades, PPE, and troubleshooting tips that experienced fabricators use to cut aluminum cleanly and safely on a miter saw. You will learn which blades to buy, how to build a zero-clearance setup, and when to switch to a better tool entirely.
Select the Right Blade for Aluminum Cutting

Choose a High-Tooth-Count Carbide Blade
A fine-tooth carbide blade is the single most important factor for safe aluminum cutting. Blades with 40 teeth or more produce smoother cuts and dramatically reduce grabbing. Standard 60-tooth finish trim blades work in a pinch, but dedicated non-ferrous blades from brands like Diablo or Avanti last longer and cut cleaner.
Avoid coarse framing blades with 24 teeth or fewer. These tear through aluminum, generate excessive heat, and dramatically increase kickback risk.
Match the Blade RPM Rating to Your Saw
Never install a blade rated below your saw’s no-load speed. Most metal-cutting blades are rated for 3,000 to 5,000 RPM, while standard miter saws spin at 5,000 RPM or higher. Exceeding the blade’s rating can cause violent failure and serious injury.
If you regularly cut aluminum, consider upgrading to a dedicated cold saw. These metal-cutting chop saws run at safer speeds of 1,500 to 3,000 RPM and accept specialized aluminum blades designed for the application.
Inspect the Blade Before Every Cut
Check for missing, chipped, or gummed teeth before each use. Damaged blades increase vibration and grabbing risk. A blade coated with melted aluminum residue must be cleaned with solvent or replaced entirely.
Running a compromised blade can damage your saw’s spindle or cause sudden kickback that throws the workpiece or the saw itself.
Wear Proper Personal Protective Equipment
Protect Your Face and Eyes
Safety glasses alone are not enough for cutting aluminum with a miter saw. Hot, sharp chips fly at high velocity and can cause severe eye, nose, and mouth injuries. Always wear a full face shield over ANSI-rated safety goggles.
One documented incident involved a short piece blowing back and causing deep lacerations requiring stitches. Proper facial protection prevents nearly all of these injuries.
Cover Your Body with the Right Clothing
Wear long sleeves made from natural fibers like cotton or denim. Synthetic fabrics such as polyester can melt when struck by hot chips, causing severe burns that are far worse than the original impact.
Add a hat or beanie to keep chips out of your hair and off your scalp. Use tight-fitting gloves when handling material, but keep them well away from the blade path during cutting.
Use Hearing Protection
Cutting aluminum produces an intense, high-pitched scream that damages hearing with prolonged exposure. Wear earmuffs or high-NRR earplugs every single time you make a cut.
Build a Secure Workpiece Setup
.jpg)
Install a Zero-Clearance Auxiliary Fence
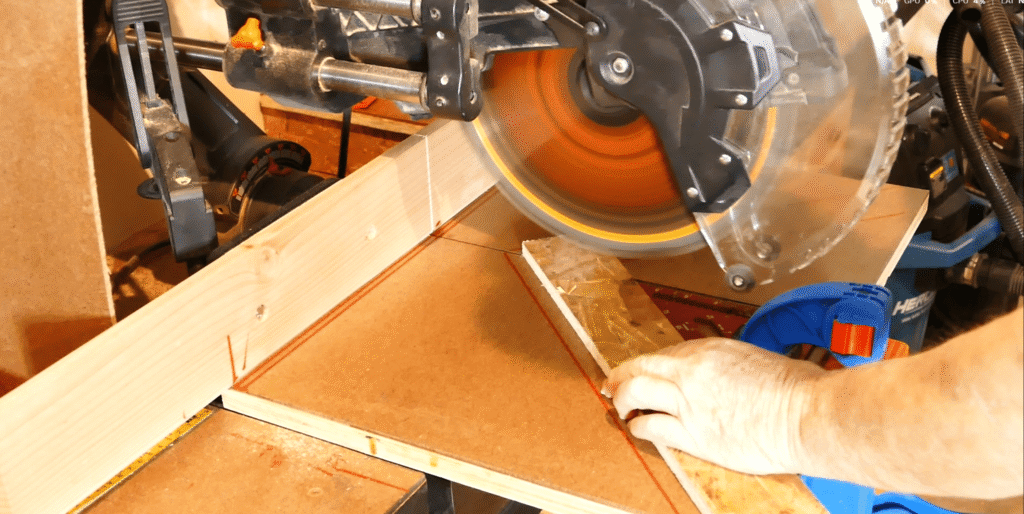
Standard miter saw fences leave large gaps where thin aluminum can flex, vibrate, or get pulled into the blade. Build an auxiliary fence and table insert from MDF, plywood, or hardboard to eliminate these gaps.
This zero-clearance setup:
– Supports thin stock right up to the cut line
– Eliminates dangerous gaps behind the blade
– Reduces chatter and binding
– Provides a surface for clamping short pieces
Secure the auxiliary fence to the saw’s base with screws or bolts so it cannot shift during cutting.
Clamp the Workpiece Firmly
Never rely on hand pressure to hold aluminum in place. Use bar clamps or quick-release clamps to secure the workpiece against both the fence and the table.
For short cuts, cut the angle on a longer piece first, then make the final cutoff. This keeps your hands farther from the blade and improves stability. Always clamp both the cutoff piece and the main stock to prevent rotation during the cut.
Master the Cutting Technique
Bring the Blade to Full Speed First
Never start a cut with the blade already touching the aluminum. Lower the spinning blade only after it reaches full operating RPM. Starting contact too early dramatically increases the chance of grab and kickback.
Feed Slowly and Steadily
Push the blade down gently and let the teeth do the work. Rushing causes overheating, gumming, and motor stall. Thin materials under 1/8 inch require especially slow, patient feed rates to prevent flexing.
If the motor starts to bog down, stop immediately and back off. Allow the saw to cool for 10 to 15 minutes before attempting another cut.
Wait Before Lifting the Blade
After completing the cut, keep the blade spinning and hold position until it slows significantly. Lifting too soon can cause small offcuts to bind or get flung by the teeth at high speed.
Lubricate to Prevent Heat and Gumming

Apply WD-40, Wax, or Soap
Dry cutting aluminum creates excessive heat that melts the material onto the blade teeth. This gumming dulls the blade quickly and produces rough, burred cuts.
Effective lubricants include:
– WD-40 sprayed lightly on the cut line or blade sides
– Bar soap such as Ivory or Irish Spring rubbed directly onto the blade
– Specialty wax sticks designed for non-ferrous metals
Reapply lubricant every few cuts, especially during long cutting sessions or when working with thick stock.
Avoid Oil-Based Lubricants Before Welding
If the aluminum will be welded after cutting, avoid WD-40 and similar oil-based products. These introduce impurities into the weld pool and compromise joint quality. Use compressed air cooling or dry cutting with very slow feeds and frequent breaks instead.
Prevent and Handle Kickback
Recognize Common Kickback Triggers
Kickback happens when the blade grabs the aluminum and violently throws it, the cutoff, or the saw backward. The most common causes include insufficient clamping, cutting thin flexible material, starting the cut too fast, and unsecured stock catching the teeth.
Stop Immediately When Something Feels Wrong
Unusual noise, vibration, or resistance means stop the cut immediately. Back the blade out, unplug the saw, and inspect the setup before continuing.
Check for:
– Damaged or missing blade teeth
– A shifted or loose workpiece
– Melted aluminum buildup on the blade
Do not resume cutting until the underlying issue is fully resolved.
Know When a Better Tool Makes Sense

Upgrade to a Cold Saw for Frequent Cuts
If you cut aluminum regularly, a dedicated cold saw is the safest and most efficient choice. These metal-cutting chop saws run at low RPM, feature built-in clamps, and use blades engineered for clean square cuts in aluminum.
Popular models like the Makita LC1230 deliver burr-free results with minimal risk.
Use a Horizontal Band Saw for Precision Angles
For mitered or precision cuts, a horizontal band saw offers superior control. Set the angle using a protractor, clamp the stock securely, and let the blade feed slowly through the material. Setup takes longer, but the safety profile is dramatically better.
Try a Portable Band Saw for Field Work
For on-site jobs, a metal-cutting portable band saw paired with an accessory miter table provides a compact, safe alternative. Quality setups are available for under $150 and dramatically reduce kickback risk compared to a standard miter saw.
Maintain Your Saw and Blade Properly
Check Spindle Runout After a Crash
If the blade binds or the saw jolts violently, inspect the spindle for runout before the next cut. Unplug the saw, mount a known-good blade, and use a dial indicator positioned near the blade body. Rotate by hand and measure side-to-side movement.
More than 0.010 inches of runout indicates a bent arbor or spindle. If rotating the blade 90 degrees does not fix the issue, the saw may need professional service or replacement.
Inspect the Fence and Insert for Damage
Cracks in the plastic insert or fence compromise safety and must be replaced immediately. After any incident, check all bolts and alignment before resuming work.
Let the Motor Cool After Stalls
If the motor stalls from overfeeding, wait 10 to 15 minutes for the thermal reset to engage. Repeated stalling damages windings and shortens motor life significantly.
Deburr and Finish Cuts Safely
Remove Sharp Edges After Cutting
Fresh aluminum cuts leave sharp burrs that cut skin on contact. Use a deburring tool, file, or sandpaper to smooth edges before handling the finished piece.
Skip Rust Protection on Aluminum
Unlike steel, aluminum does not rust. It forms a natural oxide layer that protects against corrosion. There is no need to paint, seal, or treat cut ends with products like Rust-Oleum unless you are matching a cosmetic finish.
Troubleshoot Common Cutting Problems
Motor Stalls During the Cut
The feed rate is likely too fast, the blade is dull, or lubrication is insufficient. Slow down, apply more lubricant, and replace the blade if it has lost its edge.
Blade Gums Up with Melted Aluminum
Overheating from fast feed or dry cutting causes gumming. Stop immediately, clean the blade with solvent or a wire brush, and reduce feed rate. Apply lubricant before each subsequent cut.
Chatter or Vibration During the Cut
Poor support or a loose workpiece causes chatter. Install a zero-clearance fence, clamp the workpiece more securely, and reduce feed rate.
Blade Grabs and Kicks Back
Starting in contact, improper clamping, or thin material flexing causes grabbing. Always start the cut at full speed, double-check clamps, and use auxiliary support for thin stock.
Rough, Burred Edges
A dull blade or low tooth count produces rough cuts. Replace with a 60-tooth or dedicated non-ferrous blade and slow the feed rate.
Frequently Asked Questions About Cutting Aluminum with a Miter Saw
Can you cut aluminum with a standard wood-cutting miter saw?
Yes, but only with a high-tooth-count carbide blade rated for the saw’s RPM. Standard woodworking blades work in a pinch but dull quickly and gum up more readily than dedicated non-ferrous blades.
What is the best blade for cutting aluminum on a miter saw?
A carbide-tipped blade with 60 or more teeth designed for non-ferrous metals delivers the cleanest, safest cuts. Brands like Diablo and Avanti make purpose-built blades that last longer and resist gumming better than repurposed woodworking blades.
Do I need to use lubricant when cutting aluminum?
Yes. Lubrication prevents heat buildup, reduces gumming, and extends blade life. WD-40, bar soap, or specialty wax sticks all work well. Skip oil-based lubricants only if you plan to weld the cut ends.
Is cutting aluminum on a miter saw dangerous?
It can be. Kickback, hot flying chips, and blade failure are real risks. Proper PPE, a zero-clearance setup, secure clamping, and slow feed rates dramatically reduce these hazards.
What should I do if the motor stalls while cutting aluminum?
Stop immediately and back the blade out of the cut. Unplug the saw and wait 10 to 15 minutes for the thermal reset to engage. Inspect the blade for damage and reduce feed rate before attempting another cut.
Can I cut thin aluminum sheet on a miter saw?
Thin materials under 1/8 inch are especially prone to flexing and grabbing. A zero-clearance fence, very slow feed rates, and secure clamping are essential. For very thin stock, a band saw is often the safer choice.
Key Takeaways for Cutting Aluminum Safely on a Miter Saw
Cutting aluminum with a miter saw requires preparation, the right blade, and disciplined technique. A high-tooth-count carbide blade rated for your saw’s RPM, a zero-clearance fence, secure clamping, and proper PPE form the foundation of every safe cut. Slow feed rates and consistent lubrication prevent the heat, gumming, and grabbing that cause most injuries and blade failures.
Your next step is to inspect your current blade and setup before your next aluminum cut. Replace any under-rated or damaged blade, build a zero-clearance auxiliary fence if you do not have one, and gather full PPE before starting. If you cut aluminum frequently, seriously consider investing in a cold saw or horizontal band saw for better safety and cleaner results.